15 Original Tulip Cake Decorating Ideas for Creative Bakers
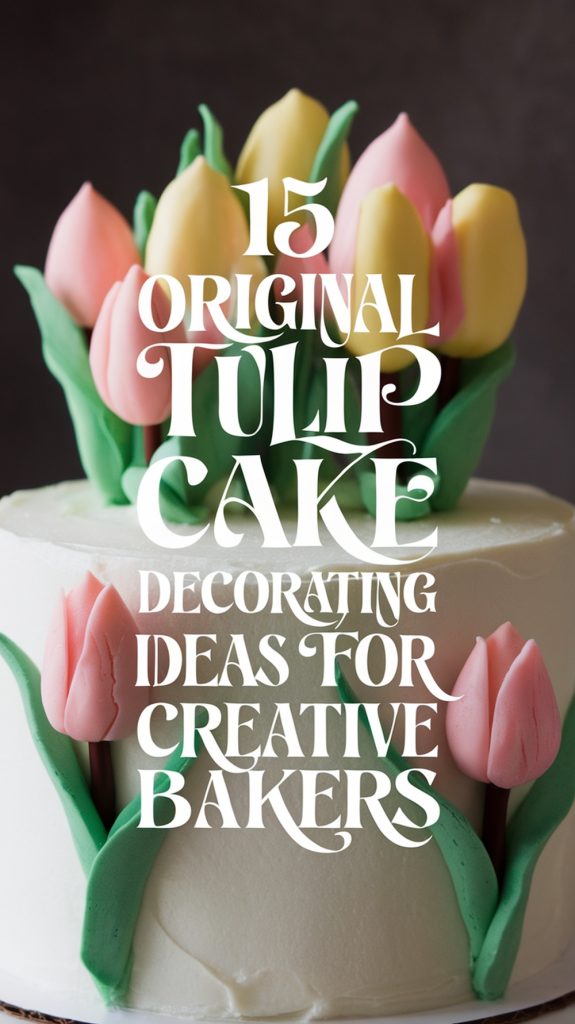
15 Original Tulip Cake Decorating Ideas for Creative Bakers
Decorating a cake with tulips is a charming way to make your dessert pop at birthdays, spring parties, or honestly, any special gathering. You can play with all sorts of shapes, sizes, and styles to create cakes that show off nothing but tulip designs.
If you’re hunting for creative ideas for your next cake, you’ll find some helpful tips and inspiration here. These tulip-themed cake decorating ideas are perfect for anyone ready to try something a little different.
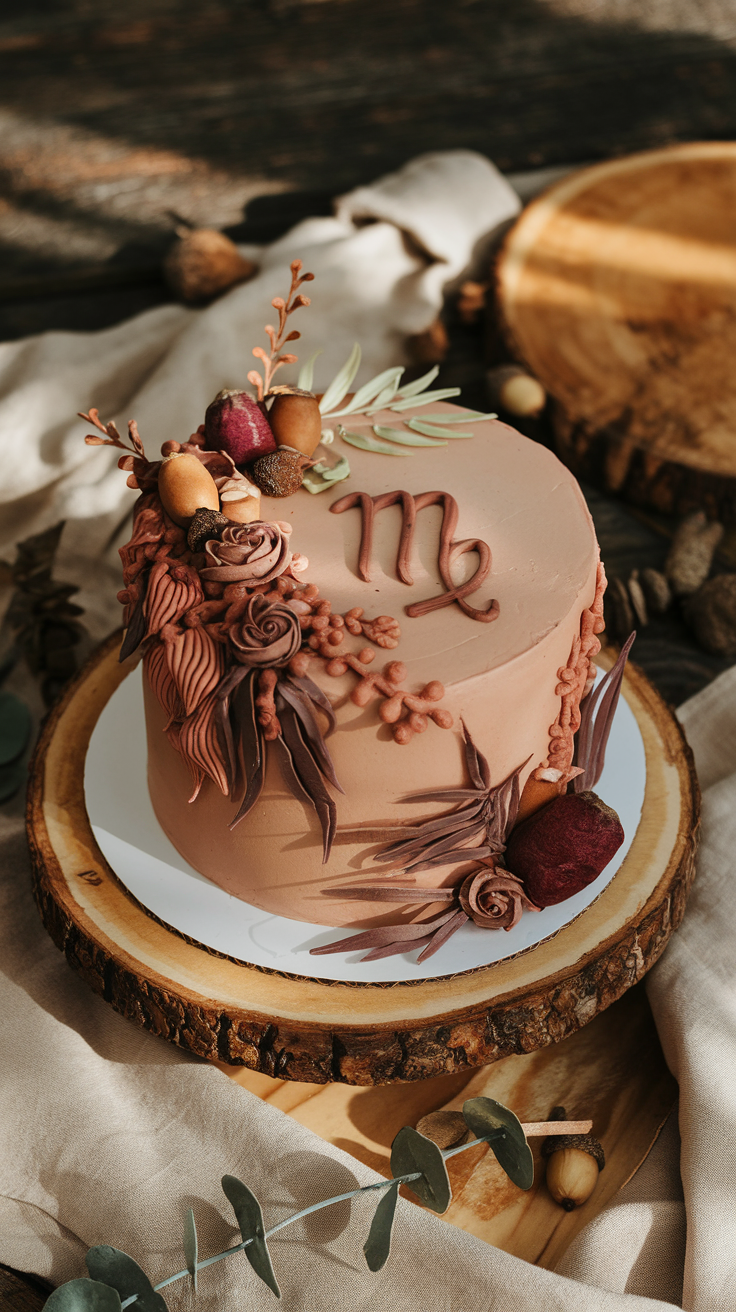
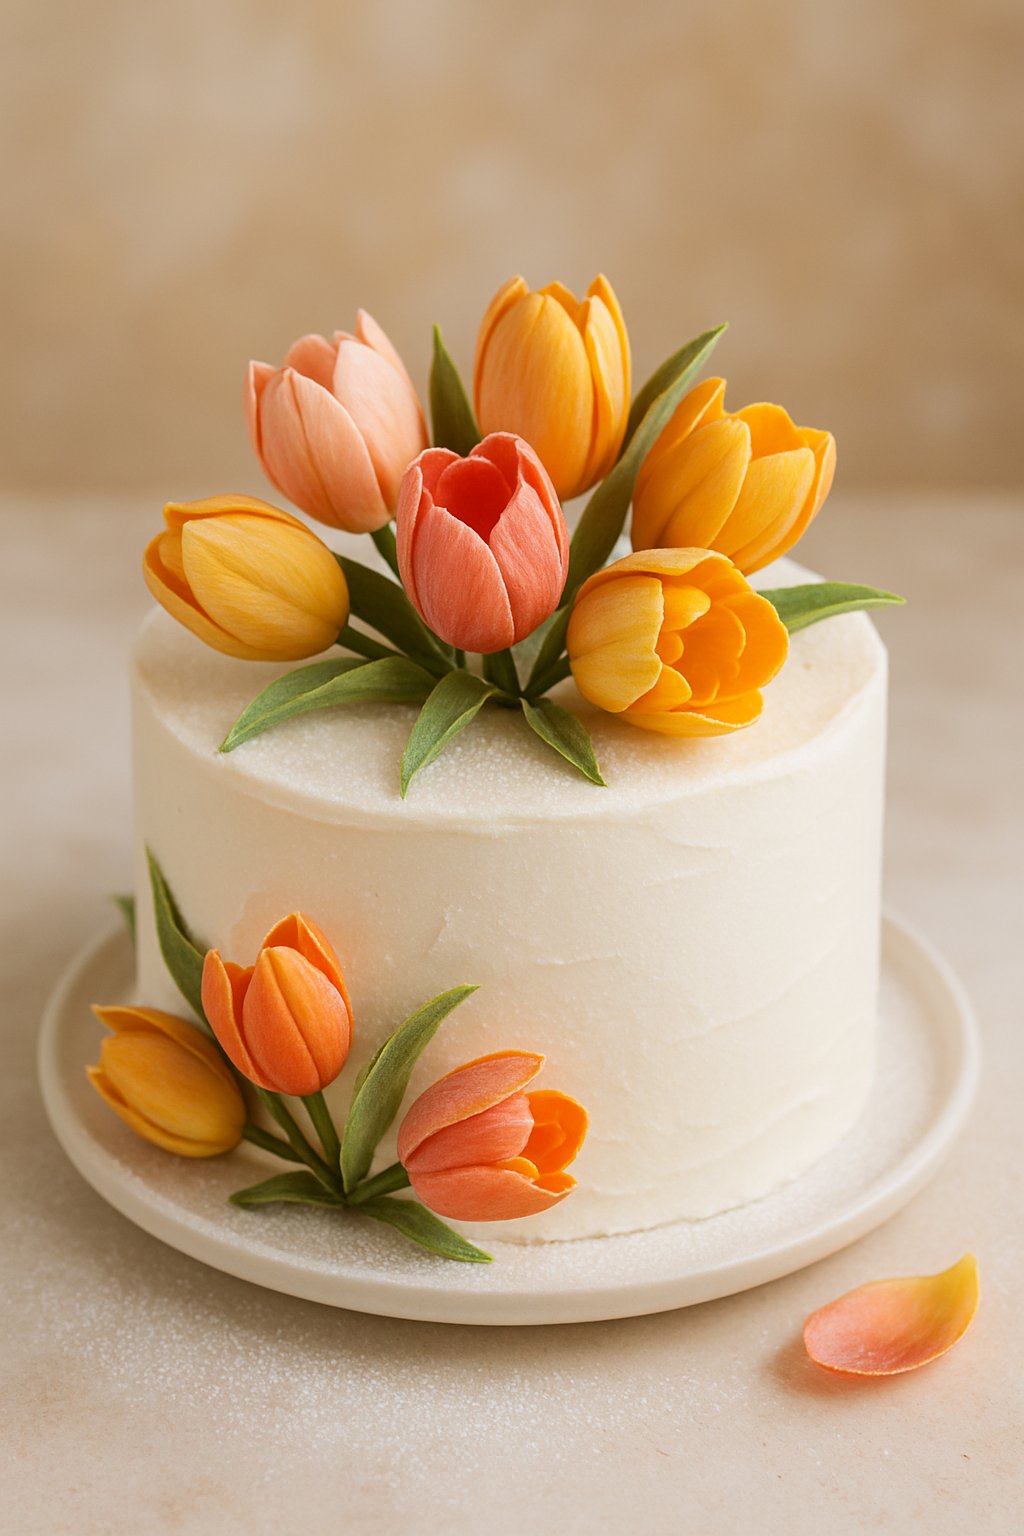
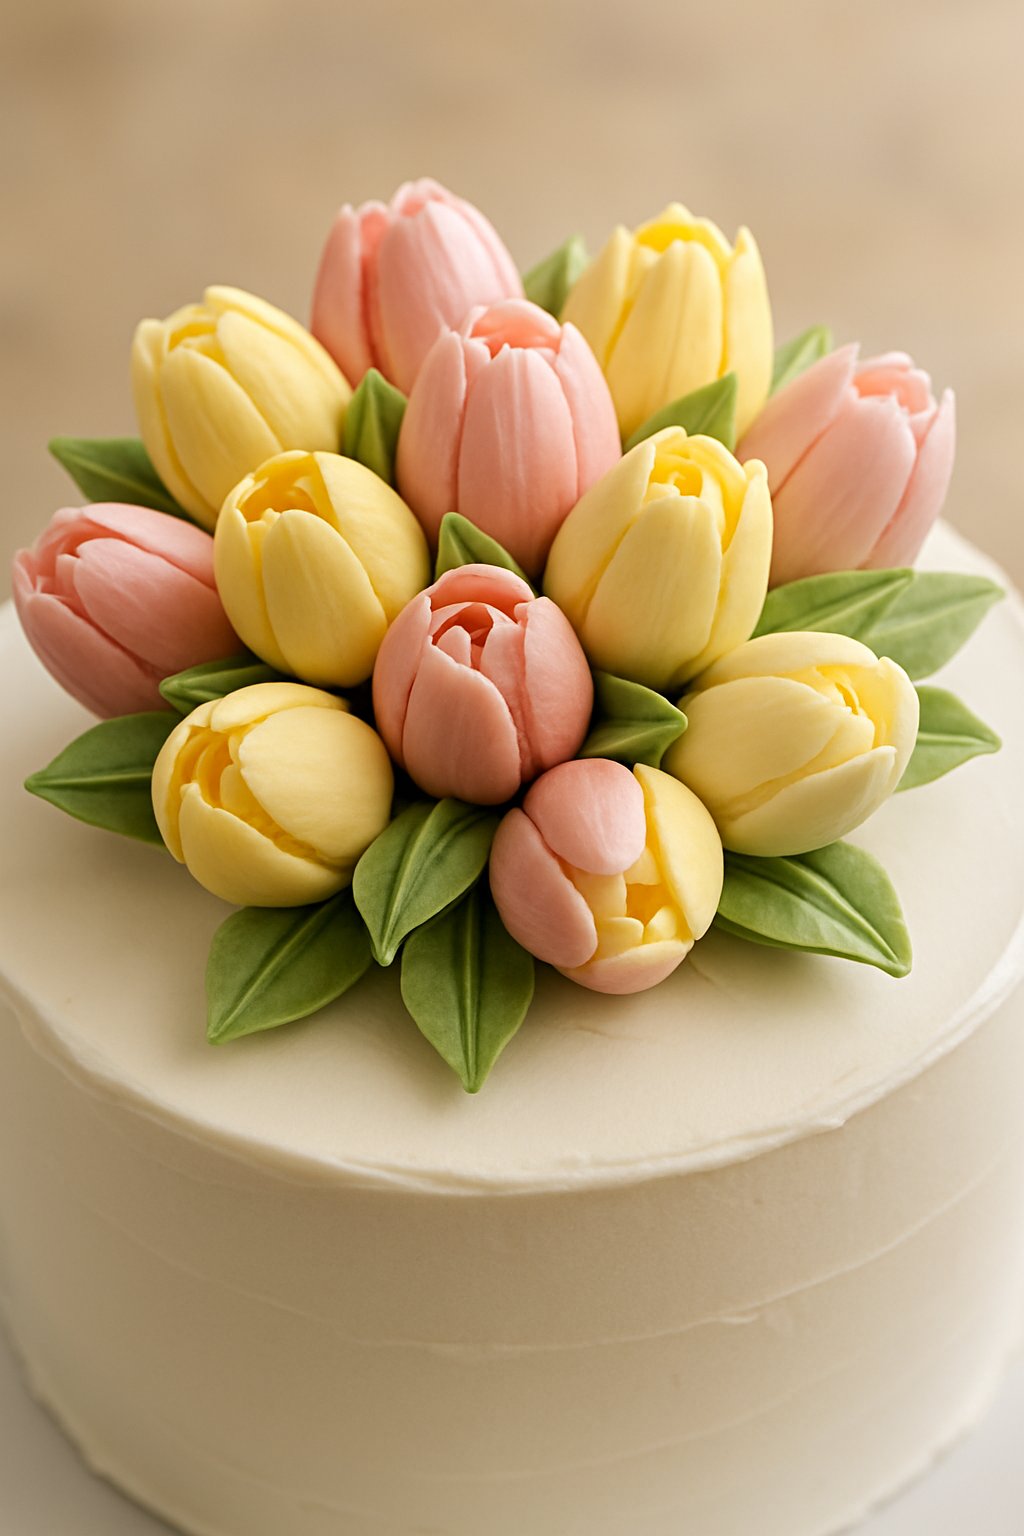
Edible Tulip Fondant Toppers
Add edible tulip fondant toppers to your cake for a playful, standout look. These little decorations work on single-layer or multi-tier cakes—totally up to you.
Shape the fondant petals by hand or grab a cookie cutter if you want a cleaner edge. Try using different colors to match your cake’s vibe. Soft pastels? Very spring. Bright colors? Super bold.
Arrange the toppers around the cake’s edges or cluster them on top. Sometimes, just one tall tulip on a smaller cake makes a sweet centerpiece.
Want more detail? Use a food-safe brush to add lines to the petals. Layer the petals gently to make the tulips feel full and realistic.
Mix up the sizes for a unique look. Tiny buds at the base, bigger tulips on top—it’s all fair game. Edible fondant stems can finish things off if you’re feeling extra.
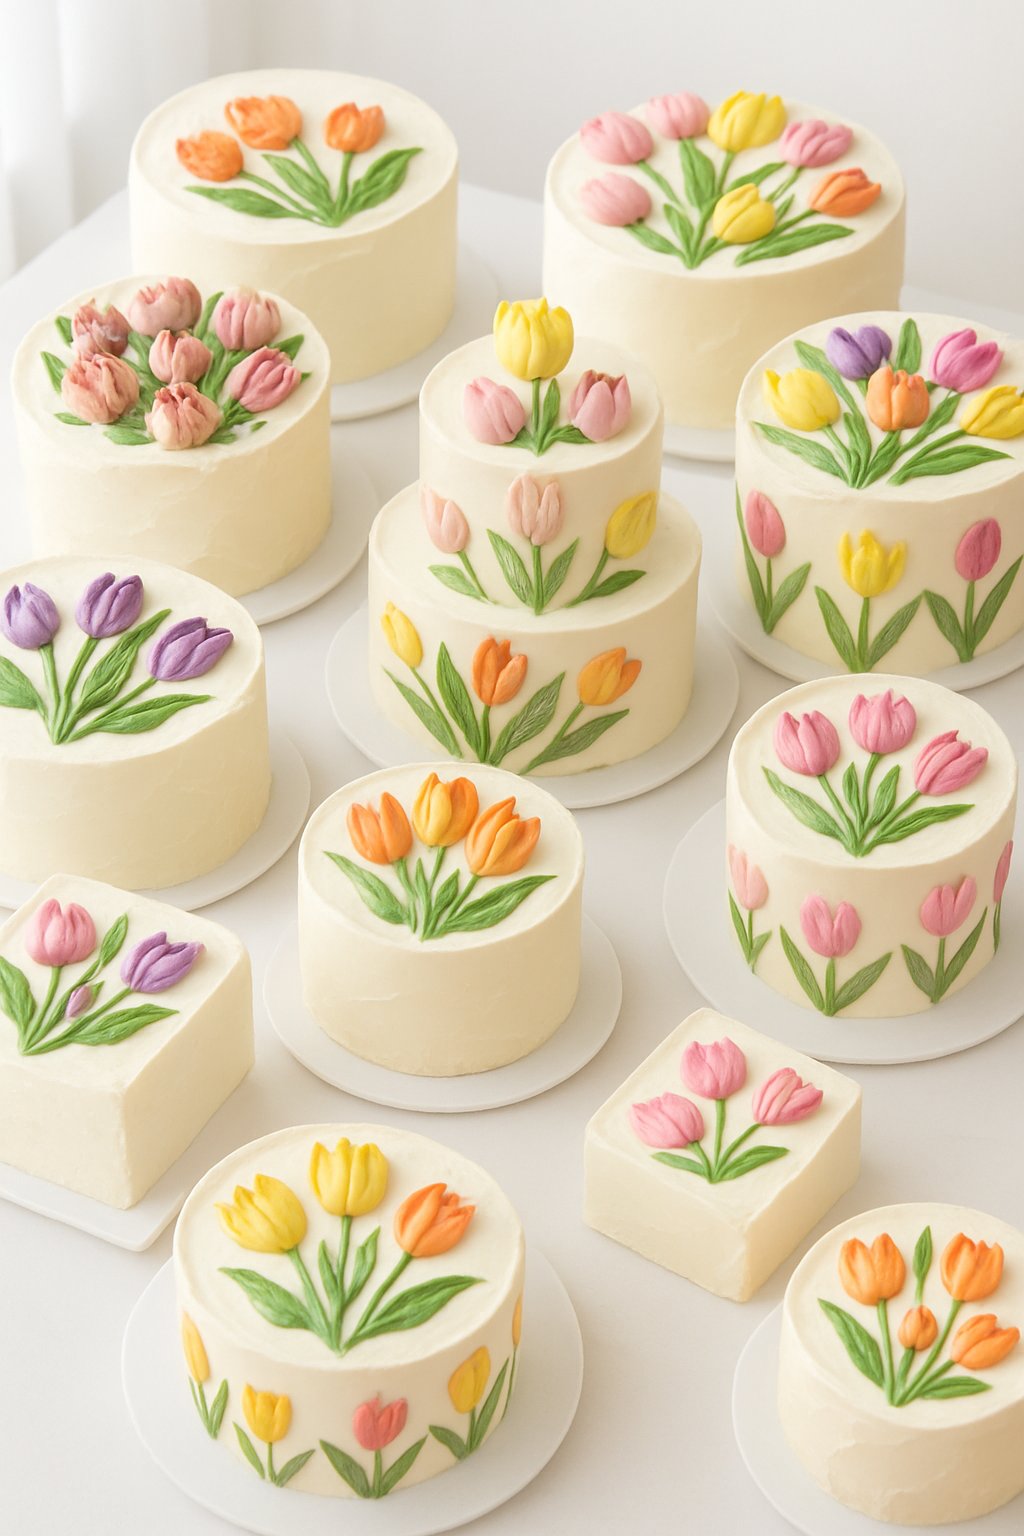
Watercolor Tulip Painting on Buttercream
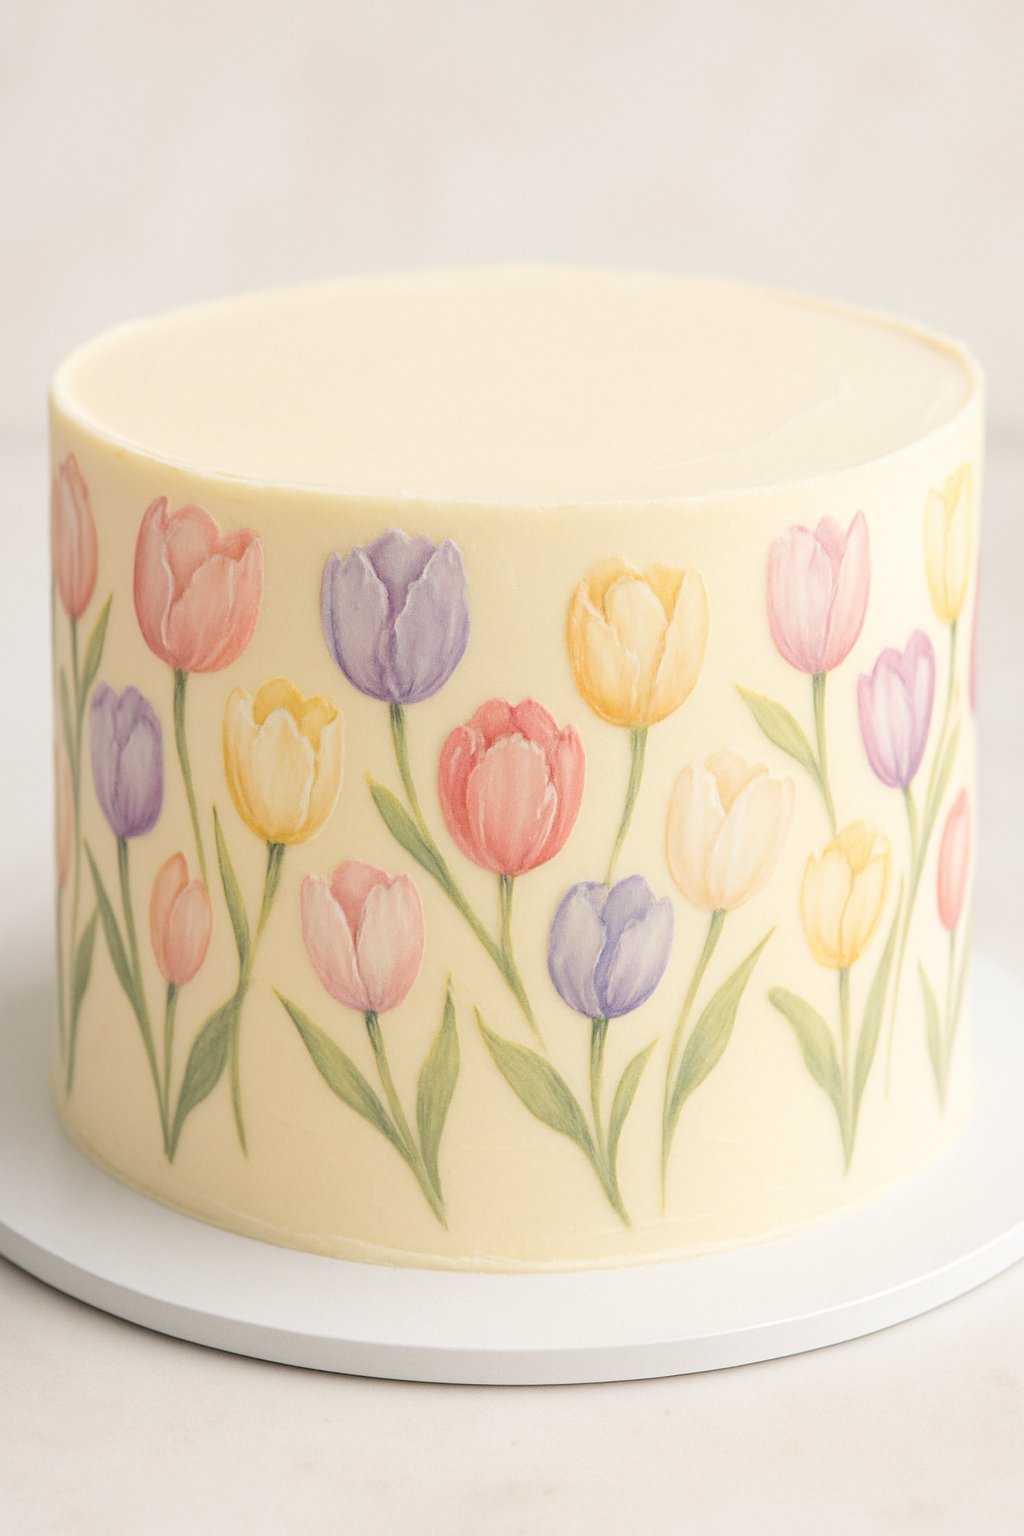
Create a soft, painted vibe on your cake using buttercream and food coloring. For that watercolor tulip effect, start with a smooth buttercream base.
Use a small offset spatula or food-safe brushes to blend pinks, reds, and yellows along the sides. Add green for the stems and leaves, blending into the petals as you go.
Work in small sections so you don’t end up with muddy colors. Chill the cake between layers if things start to get messy.
You can paint one big tulip as a focal point or scatter smaller tulips around. This works for single, double, or even three-tier cakes.
If you want more drama, layer on darker colors for contrast. For something light and airy, stick with pastels and blend softly. Either way, hand-painted tulips always bring a unique touch to your cake.
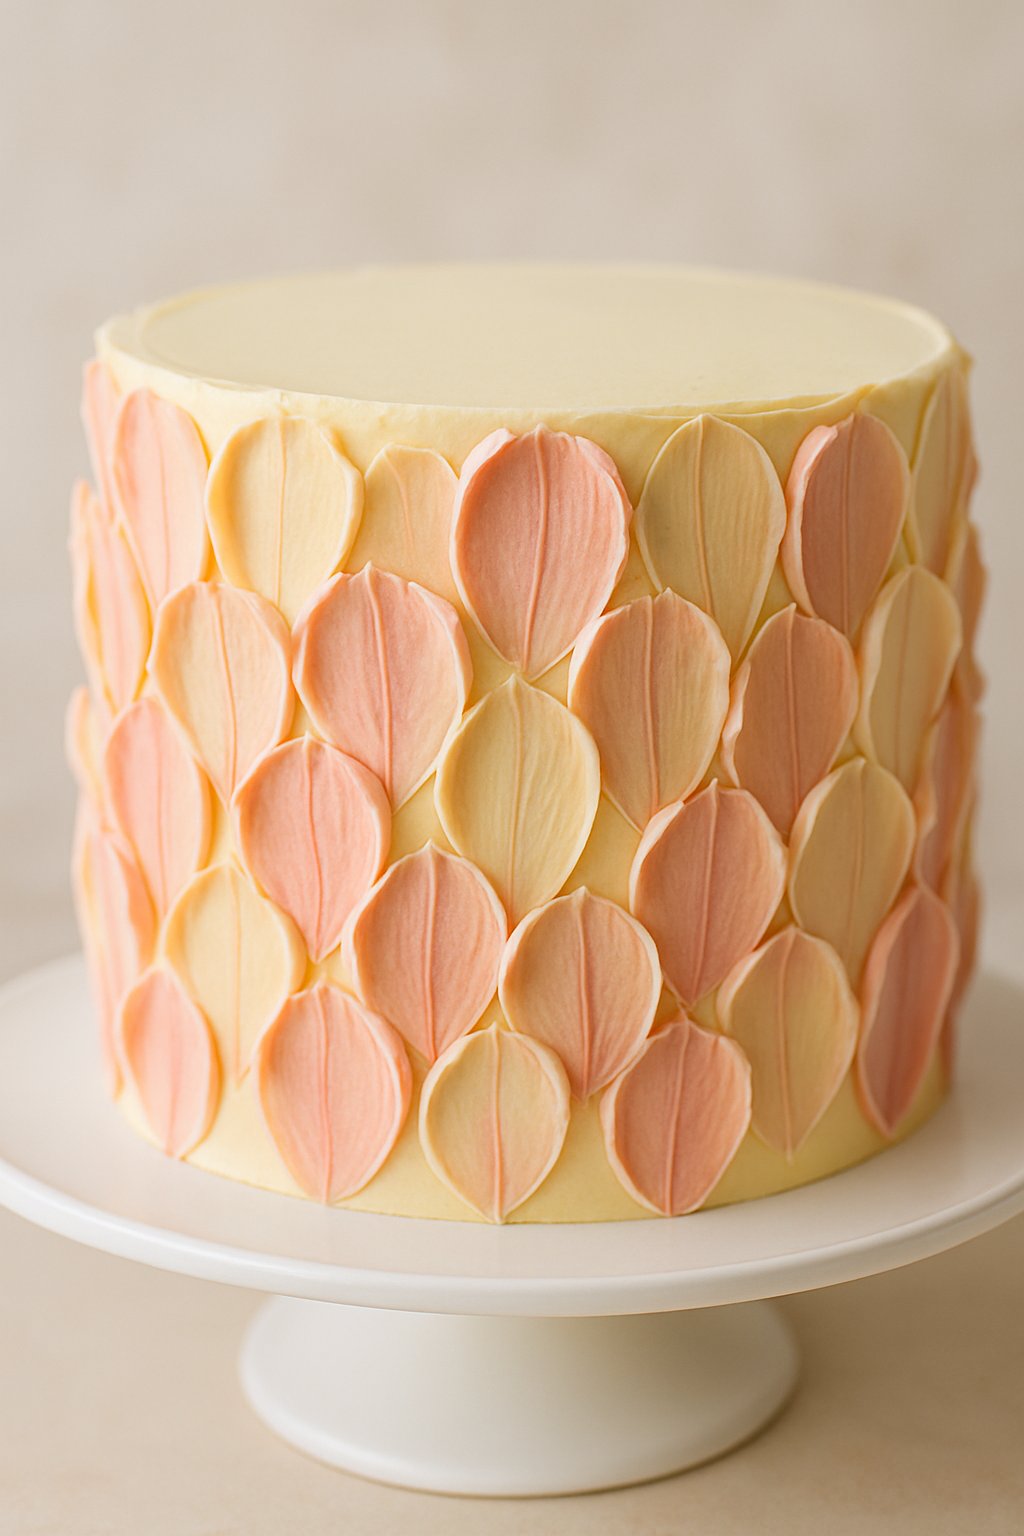
Pastel Ombre Tulip Petals
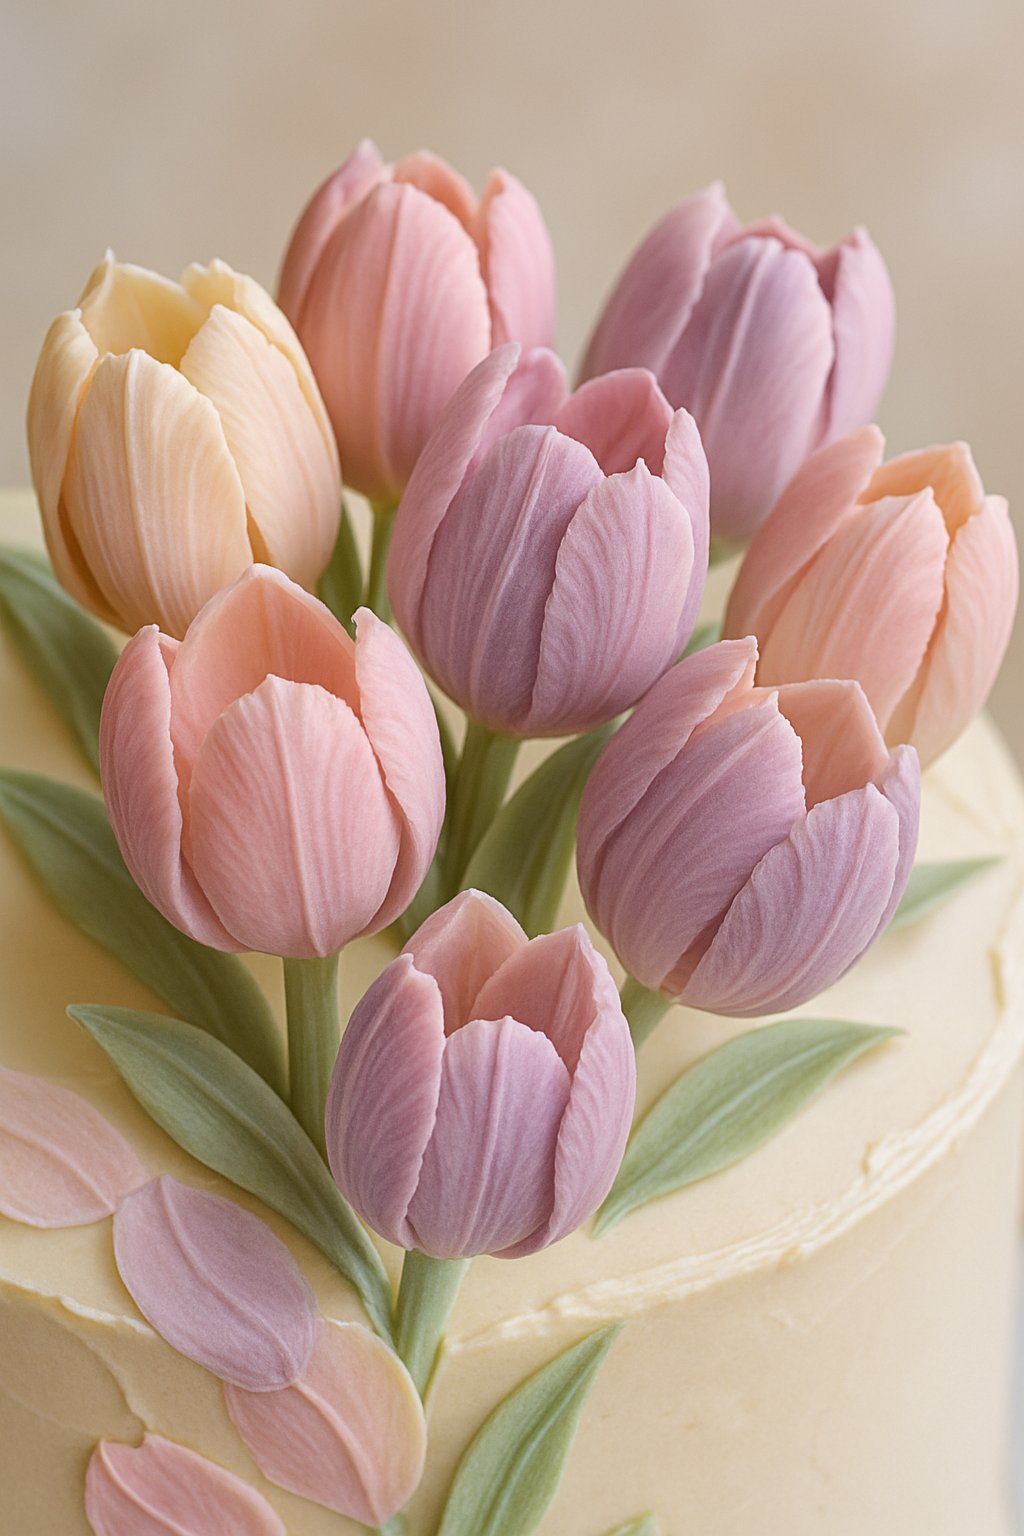
Pastel ombre tulip petals add a soft, dreamy look to your cake. Layer shades of pink, purple, or yellow on each petal, starting with the lightest at the tips.
This style works on single-layer or tall tiered cakes. Use tinted buttercream or fondant to create that gentle color shift.
Arrange the petals so the ombre effect pops from every side. Place petals close for a full look, or space them for something lighter.
Match the cake’s base color to your pastel theme, or just go with white for a crisp background. You can use this idea on round, square, or even heart-shaped cakes.
Whether it’s for a birthday, shower, or spring event, pastel ombre tulip petals give your cake a fresh, fun vibe.
3D Tulip Piping with Royal Icing
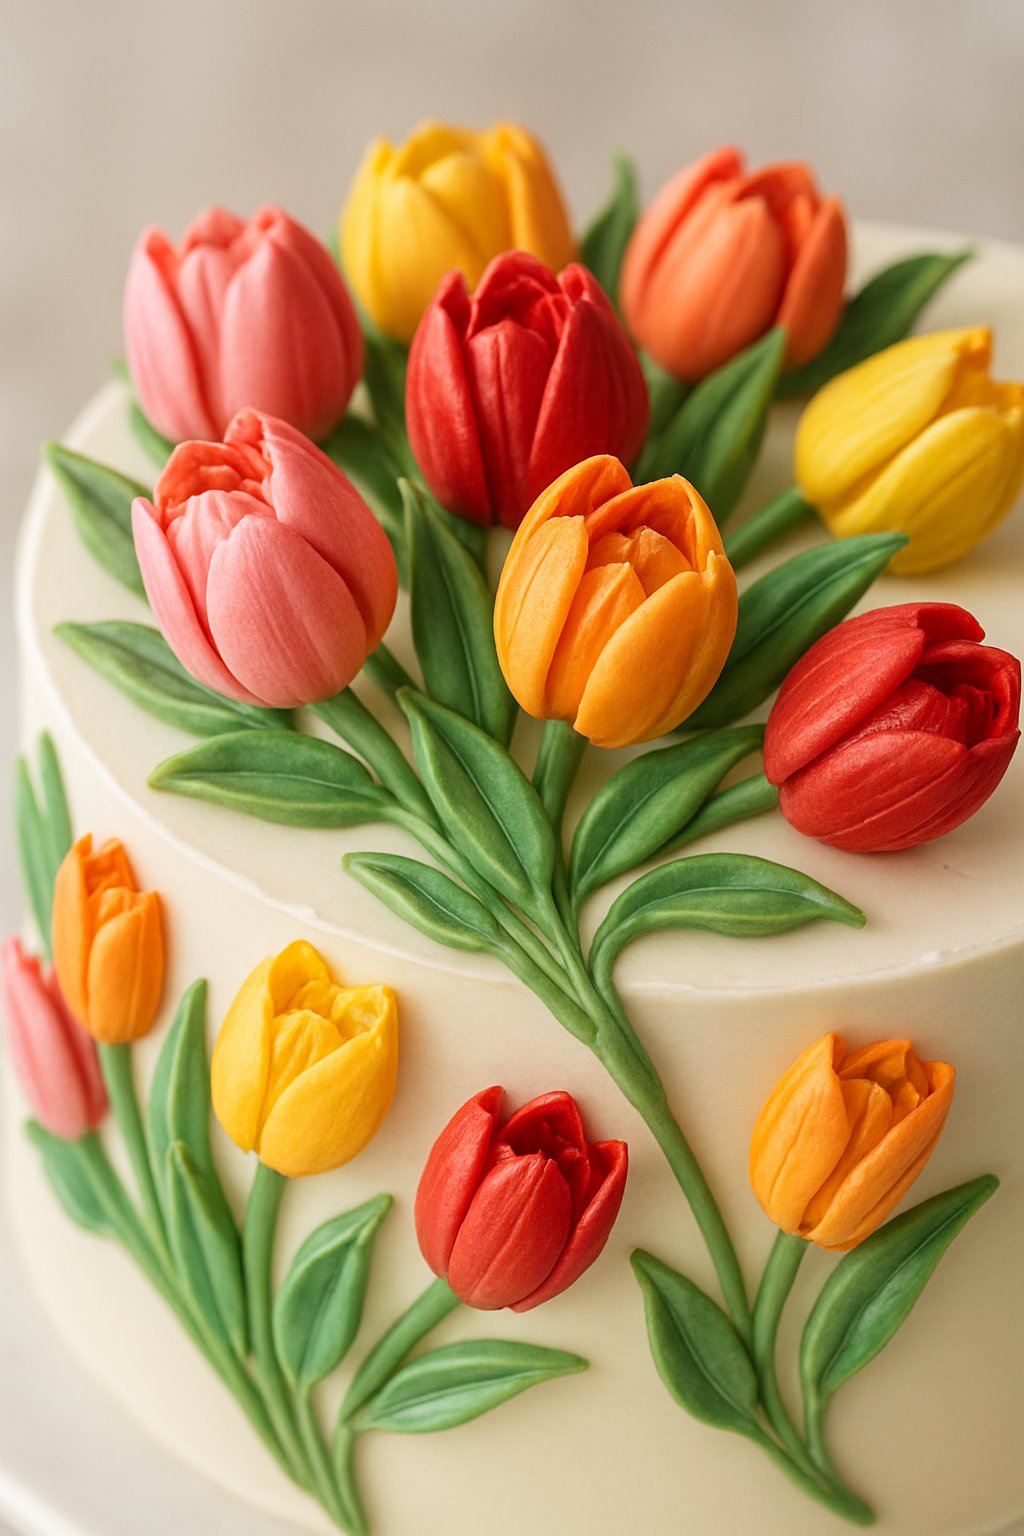
Pipe realistic 3D tulip shapes with royal icing for a cake that looks like a little garden. Mix your royal icing until it holds its shape, then use a petal piping tip for each tulip.
Pipe one petal at a time, turning your cake as you go. Layer petals by adding a second or third row so each tulip pops.
Add a small oval of yellow or green icing for the tulip’s center. Use different colors for variety. You can pipe tulips in rows for a tidy garden or scatter them for a wilder effect.
This technique works for cakes of any size or shape. Tulip piping with royal icing adds a detailed, almost sculpted touch to your cake.
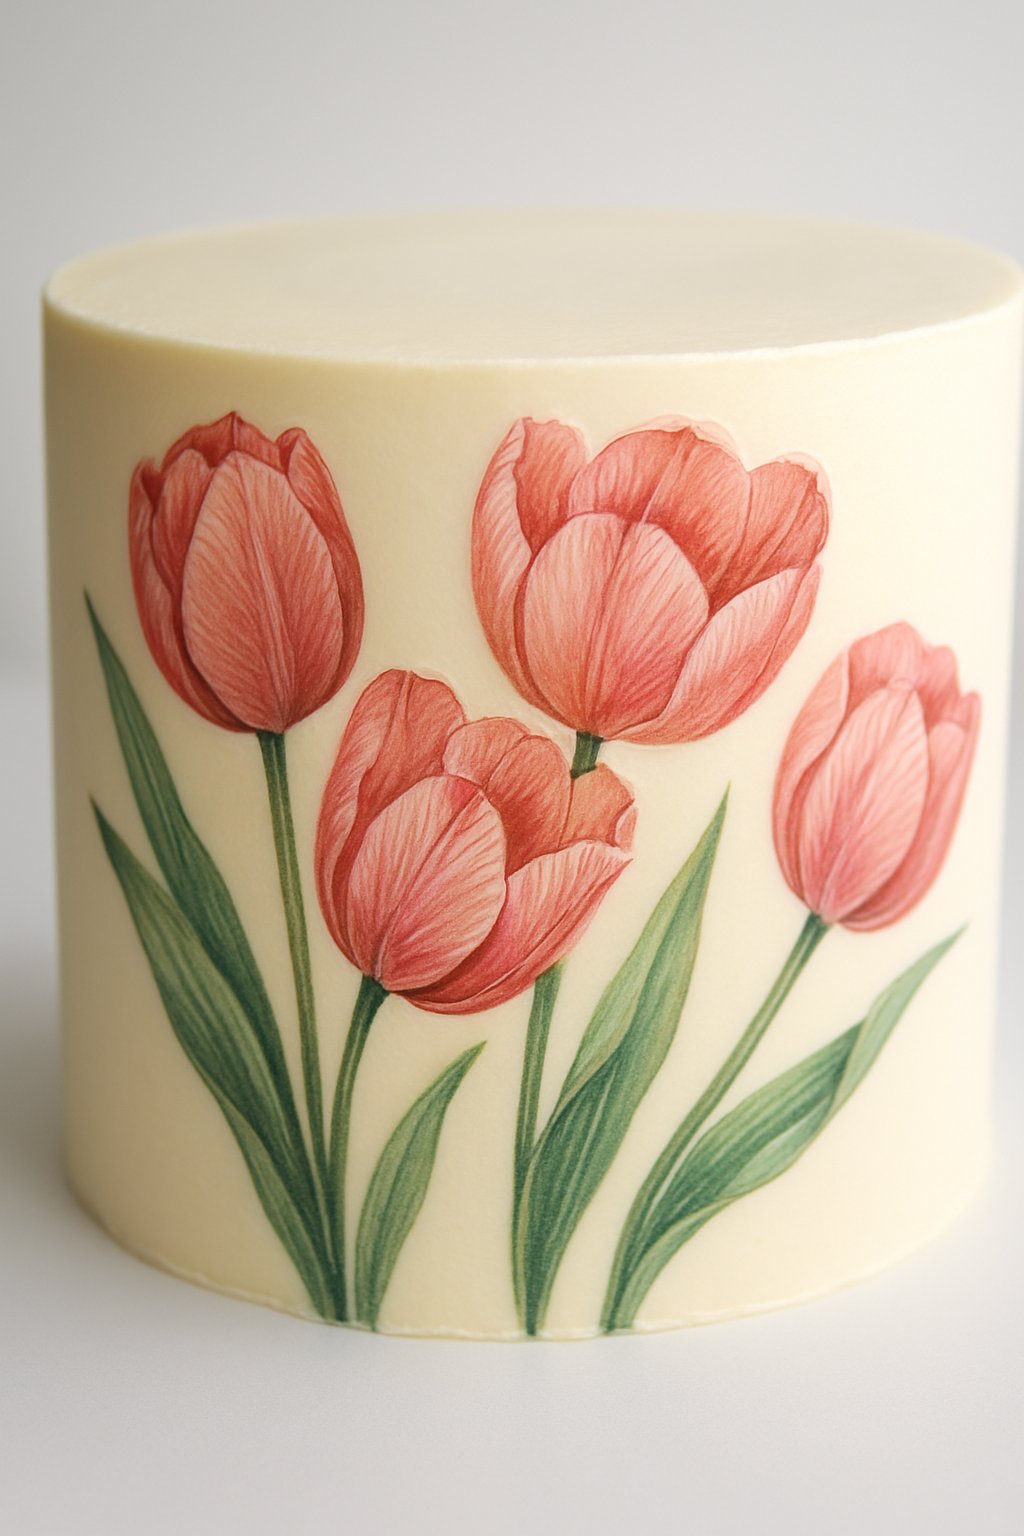
Hand-Painted Tulip Design on Fondant
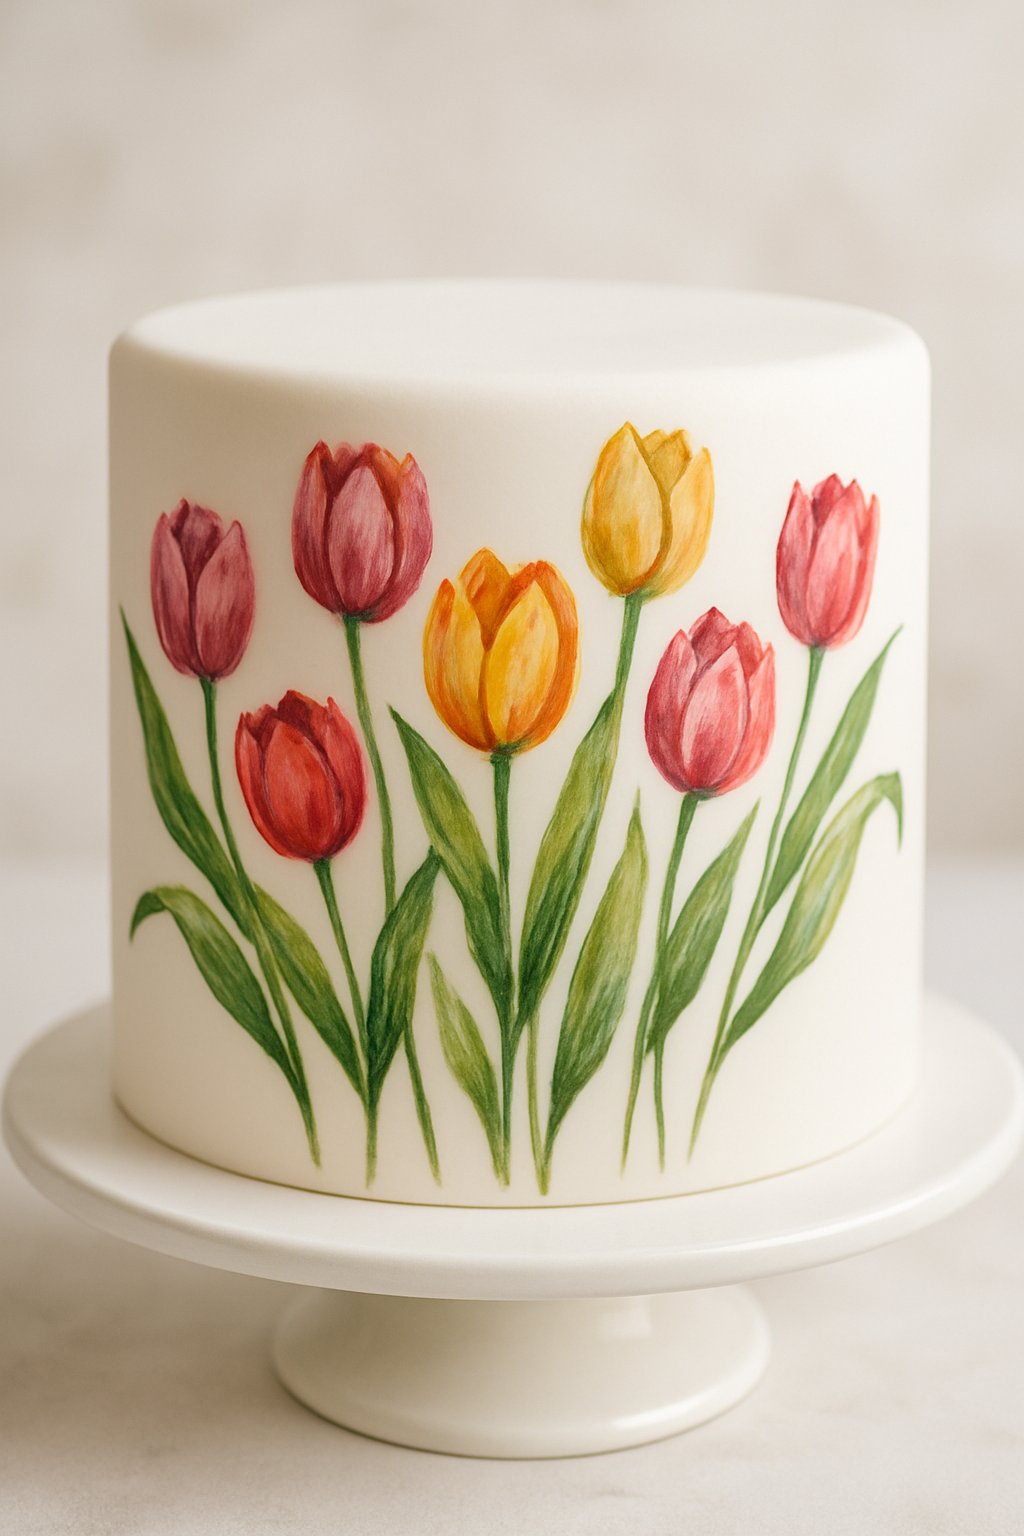
Hand-paint tulip designs directly onto fondant for a cake that’s truly one-of-a-kind. Cover your cake with smooth, white fondant to start.
Mix edible gel food colors with a bit of clear alcohol or lemon extract to make your paint. Thin brushes help you outline and fill in each tulip shape.
Add short, simple strokes for petals and use green for leaves and stems. Go for bright oranges, reds, pinks, or yellow—whatever feels right for you.
You can paint tulips standing up straight or tilt some for a bit of movement. This works on round, square, tall, or short cakes, and you can scale it up for multi-tier designs.
Let each painted area dry before moving your cake. If you’re nervous, practice on parchment paper first. It’s worth it for crisp, clear tulip shapes.
Sugar Tulip Flowers with Dusting Powder
Decorate your cake with sugar tulip flowers for a pretty, spring-inspired look. Shape tulip petals from gum paste or fondant and let them dry until they hold their form.
Once the petals are ready, dust them with soft powders in pink, yellow, or white. Use a small brush and focus on the edges and tips for a delicate effect.
Arrange the finished sugar tulips on top or around the sides. Add green leaves if you want a more natural vibe.
Try a few big tulips as a centerpiece, or scatter smaller clusters for something lighter. With gentle dusting, colors look soft and realistic. This method works for birthdays, weddings, or honestly, any celebration.
Tulip Stencil Airbrushing Technique
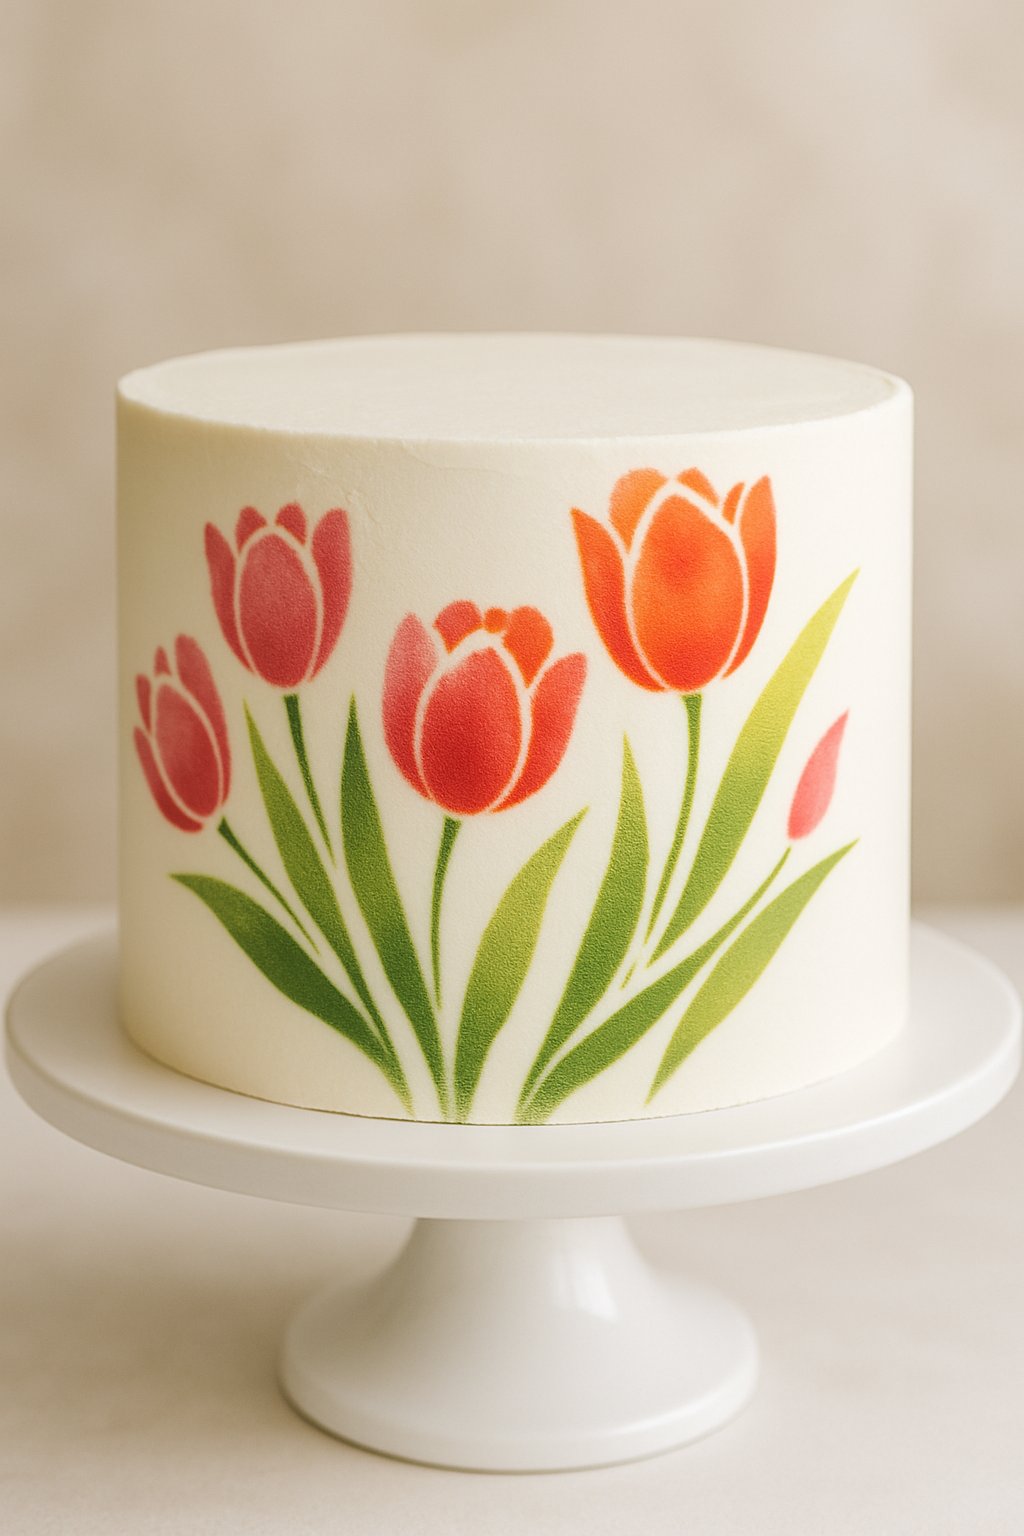
Use a tulip-shaped stencil and an airbrush for a sleek, clean tulip design. Place the stencil flat against your cake and make sure it stays put.
Pick your food coloring and lightly spray over the stencil, holding the airbrush about six inches away. This gives you crisp tulip shapes.
Mix it up with different colors—red, yellow, purple, whatever suits your mood. This makes the cake look lively and interesting.
Try this on round, square, heart-shaped, or multi-tier cakes. It’s pretty flexible and works for single or double layers.
Clean the stencil between uses to avoid smudges. If you haven’t tried airbrushing before, practice on a plate or paper first.
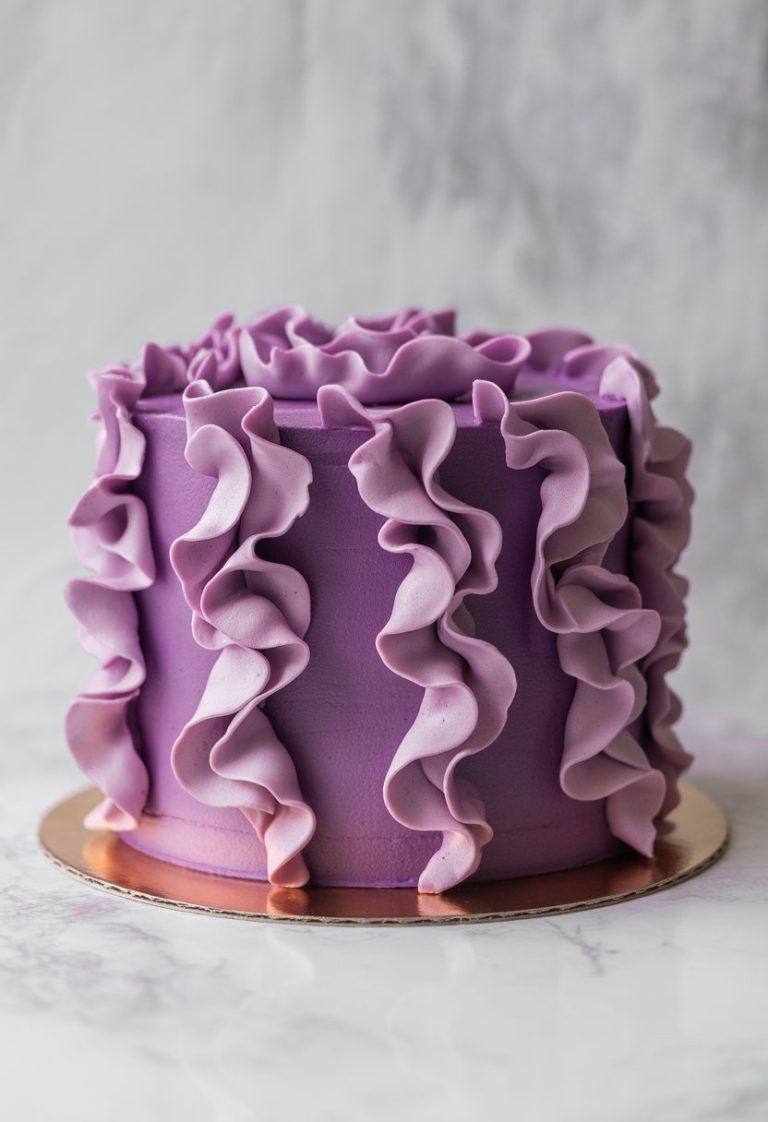
Tulip Petal Ruffle Effect
For a tulip petal ruffle effect, use thinly rolled fondant or soft buttercream. Cut out petal shapes with a small oval cutter, then shape the edges with your fingers or a ball tool to get that natural ruffle.
Place each petal on the cake’s side, overlapping in layers. It’ll look like your cake is cloaked in real tulip petals.
Mix different shades of the same color for a more natural look. This works on round, square, or even mini tulip cakes.
Cover a whole cake, or just add ruffles to the top or bottom edge. For multi-tier cakes, try ruffles on just one tier for a cool focal point.
Soft pastels like pink, yellow, or purple really make the tulip effect pop. Keep petals a bit loose—don’t press them flat—so they look more lifelike. This design brings a fresh, textured feel that’s sure to stand out at any celebration.
Chocolate Tulip Garnish
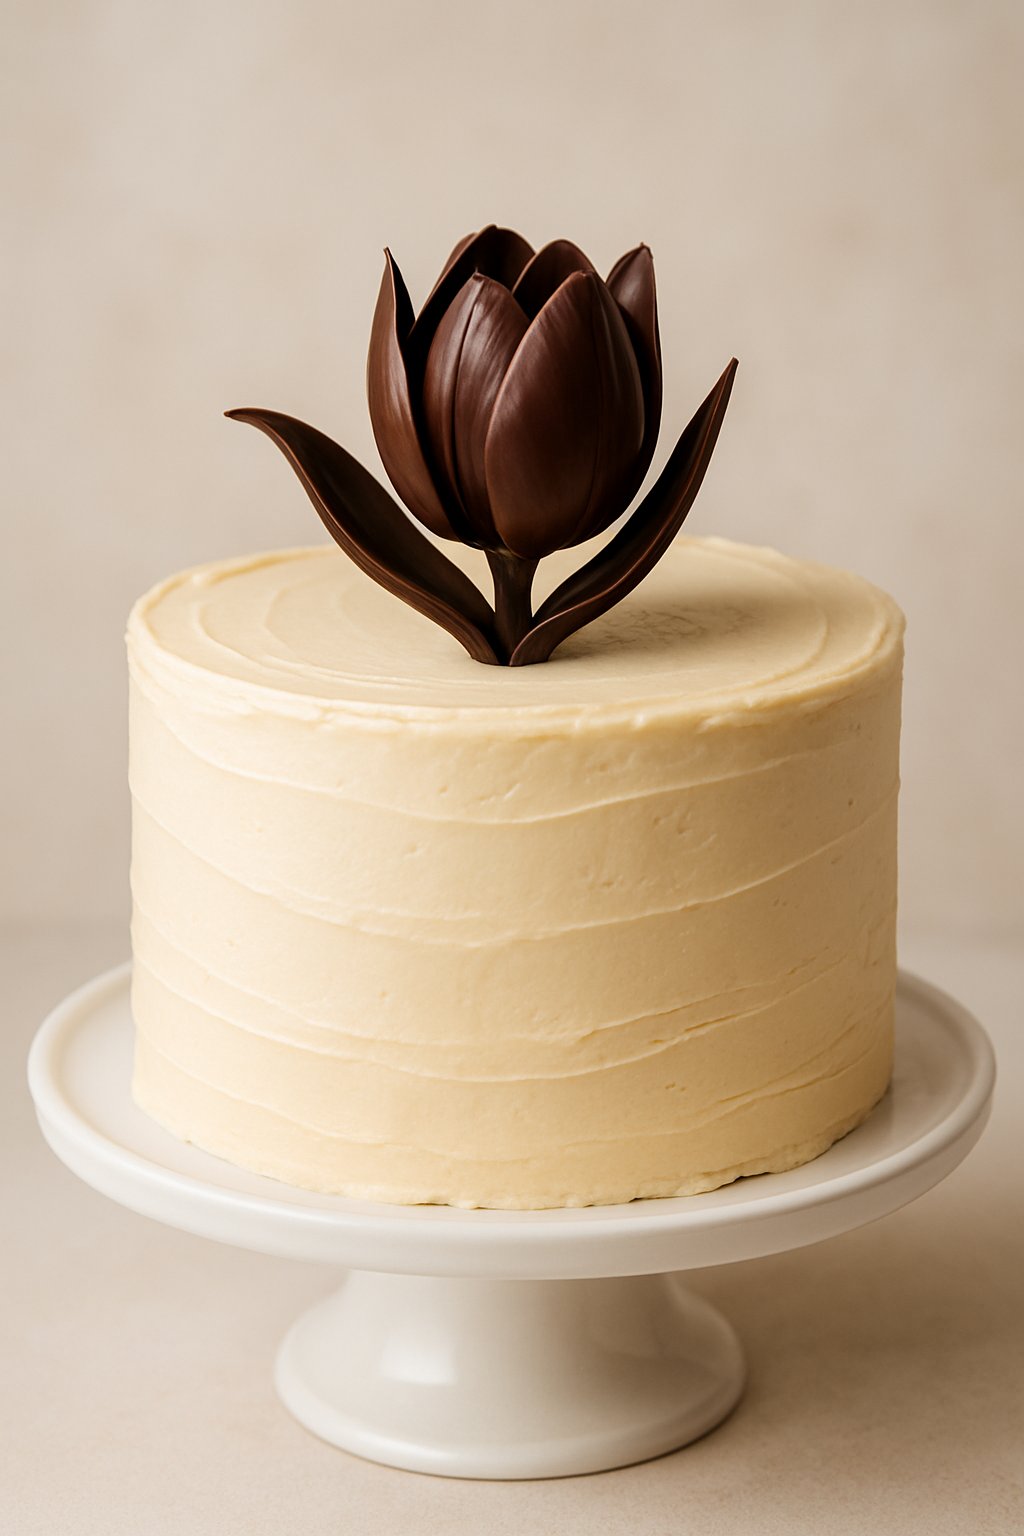
Want your tulip cake to pop? Try chocolate tulip garnishes—they’re simple and look fancy.
Melt some chocolate, then pipe tulip shapes onto wax paper. Let them set, then gently peel them off and stick them around the edge of your cake.
Dark, milk, or white chocolate all work. If you’re after more color, colored candy melts do the trick.
Swirl a couple of colors together if you want a marbled look. The effect’s pretty cool, and it’s not much extra work.
Add these chocolate tulips to the sides of a round cake. Or, top a batch of cupcakes arranged like a tulip bouquet.
For tiered cakes, scatter the chocolate shapes at different heights for a layered vibe. It’s a quick way to make a plain cake feel special.
You can make these ahead! Just store them in a cool, dry spot until you’re ready to decorate.
Tulip-Shaped Macaron Accents
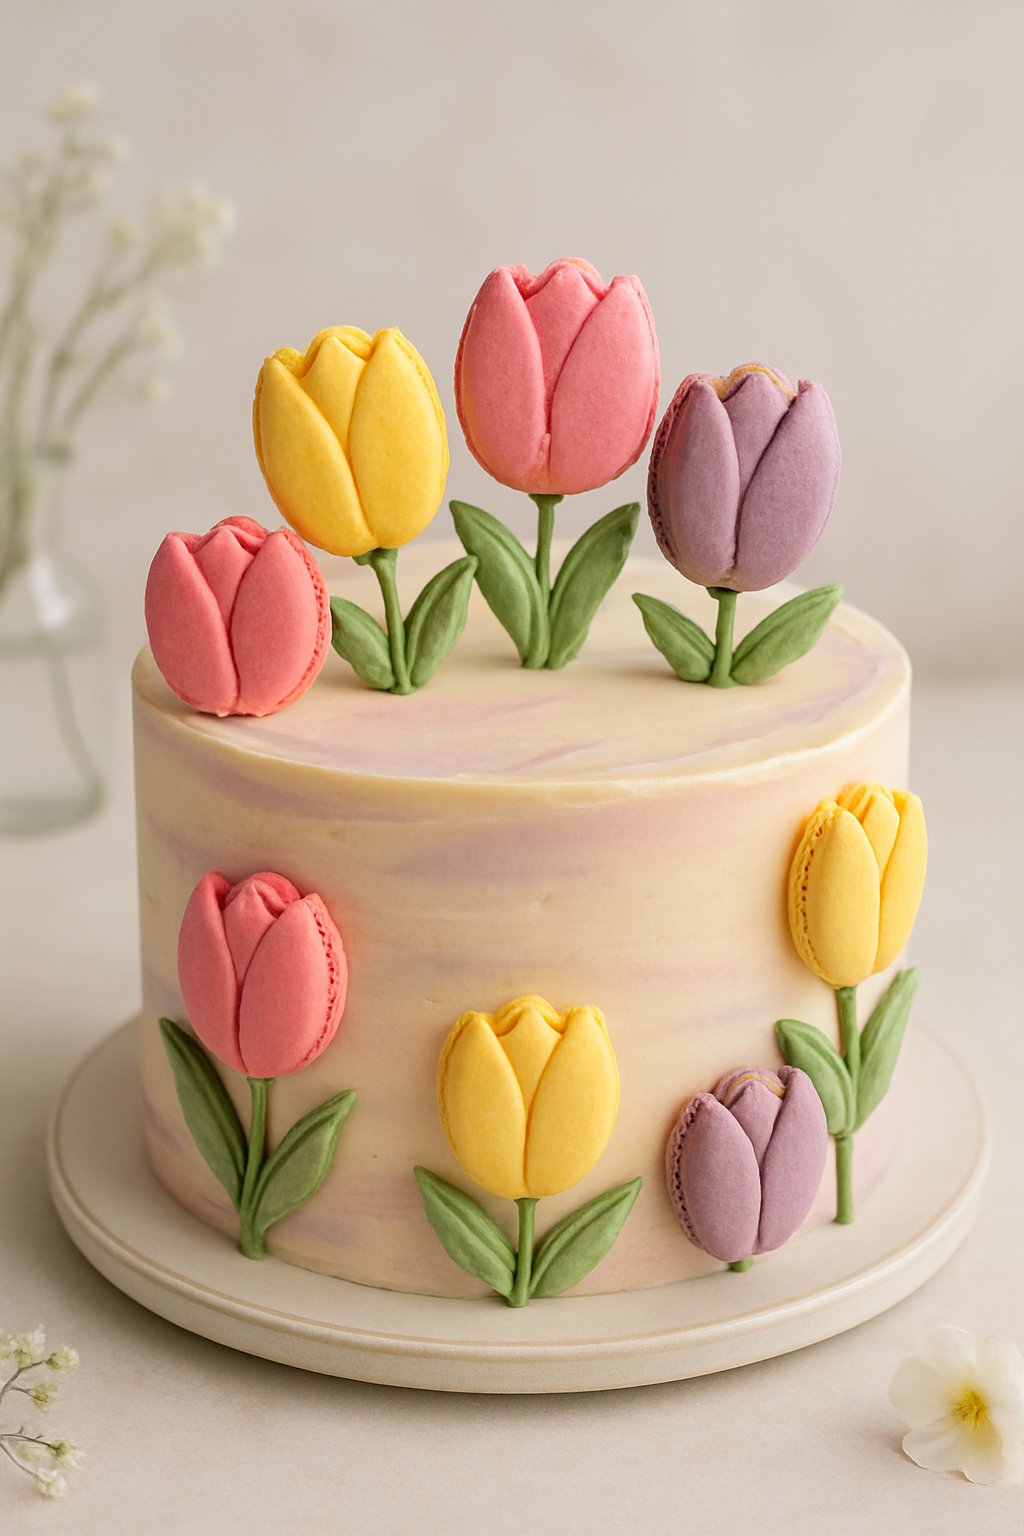
Tulip-shaped macarons make cakes look playful and bright. Bake them in bold or pastel colors to fit your theme.
Arrange the macarons around the cake’s edge or stack them on top as a colorful arrangement. It’s a cheerful touch that’s hard to resist.
Tiered cake? Add macarons to each layer’s sides. This works with round or square cakes and gives a creative, modern twist.
Try using different shades of one color for an ombre effect. You can line them up or cluster them—whatever feels right for your style.
For smaller cakes, just a few macarons on top or at the base keep things tidy. It’s enough to show off the tulip theme without going overboard.
Be sure to use baking-safe food coloring so the flavor stays true. It’s a small detail, but it matters.
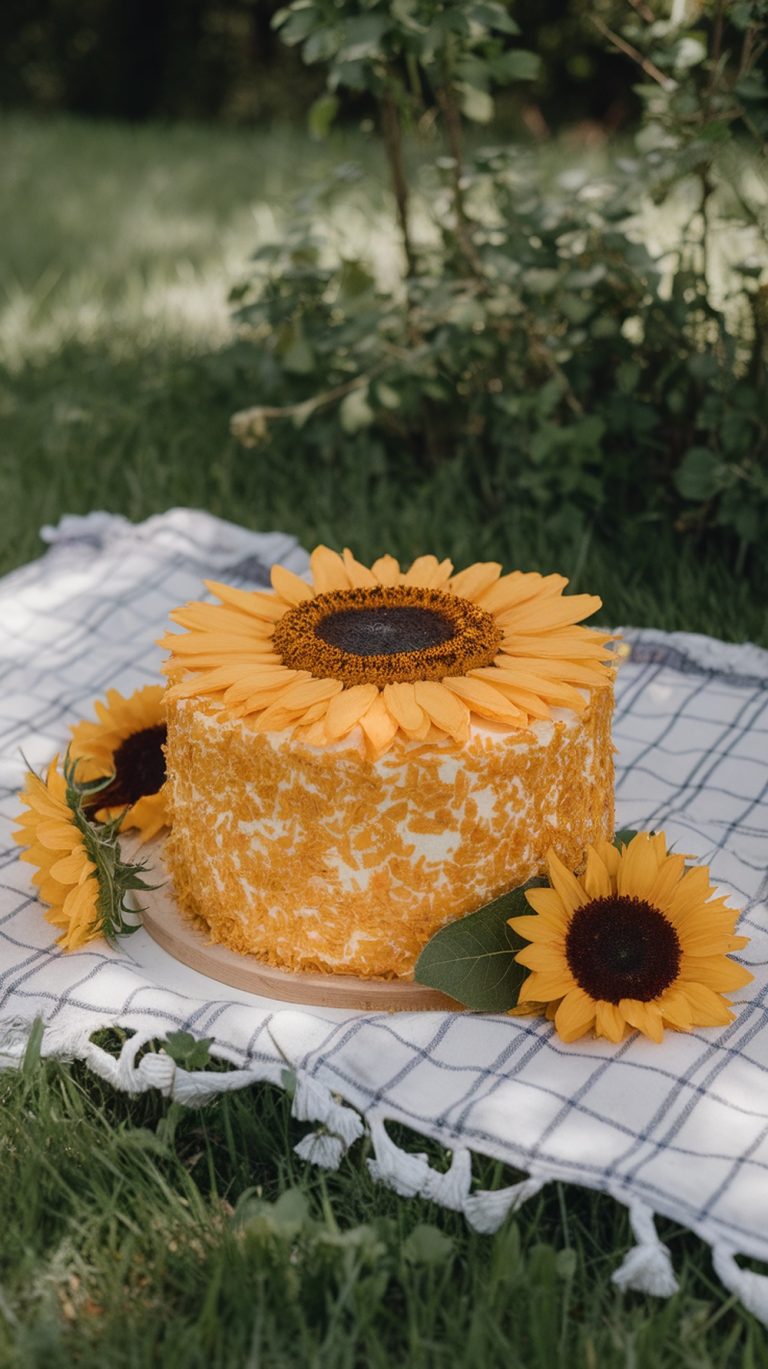
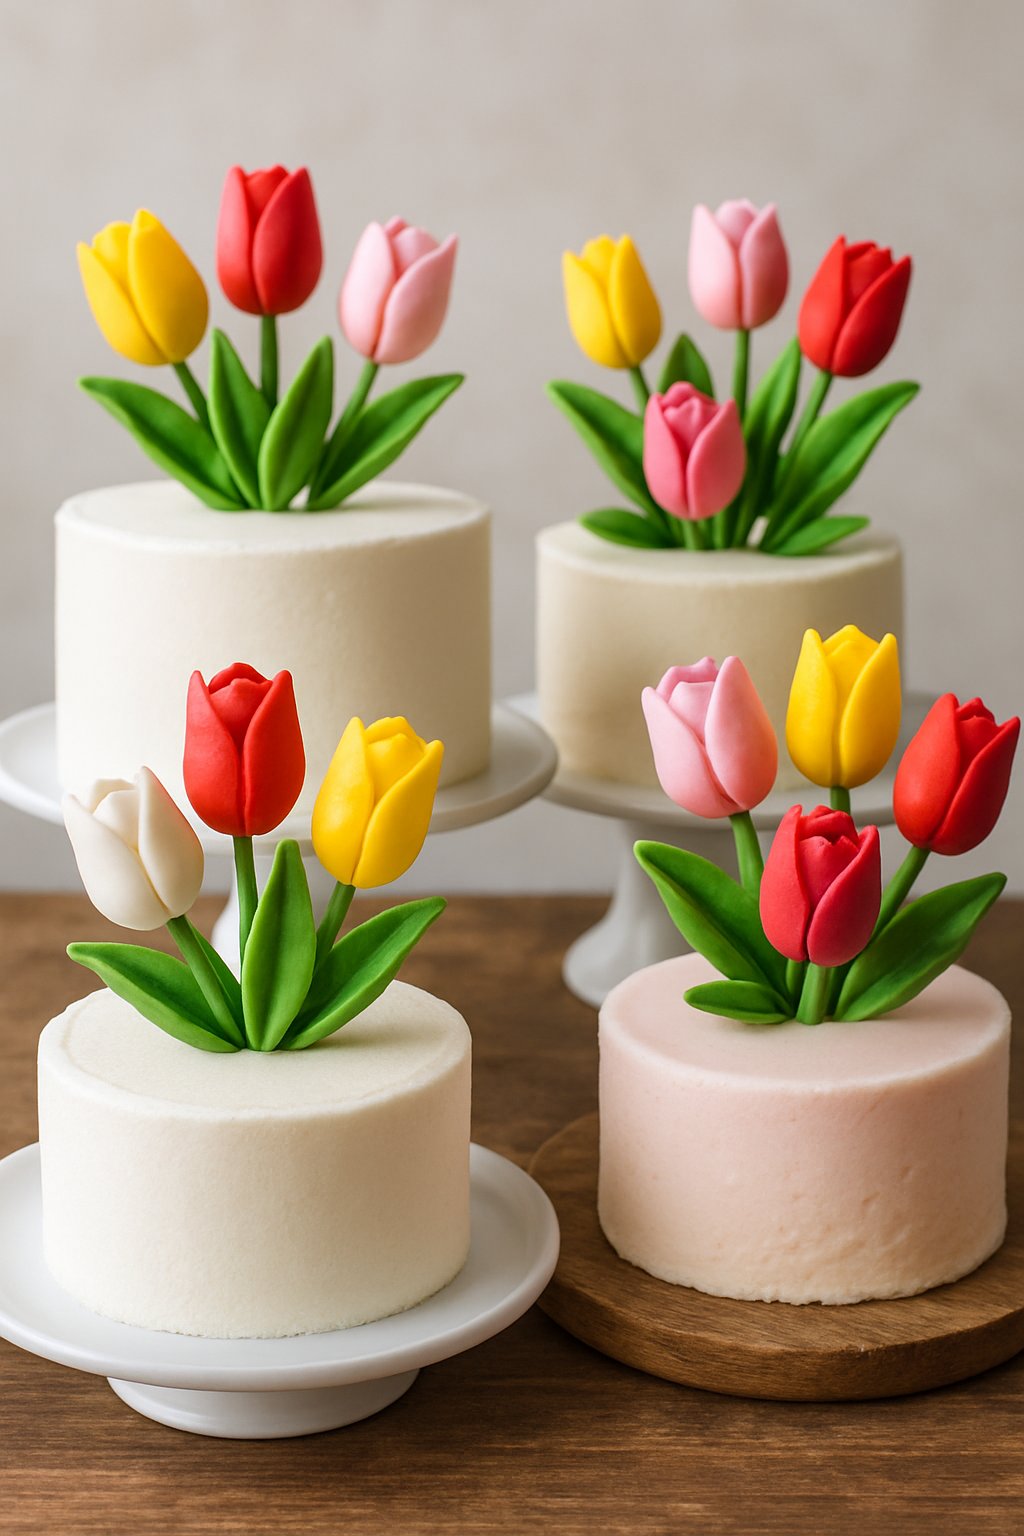
Fresh Tulip Arrangement as Cake Topper
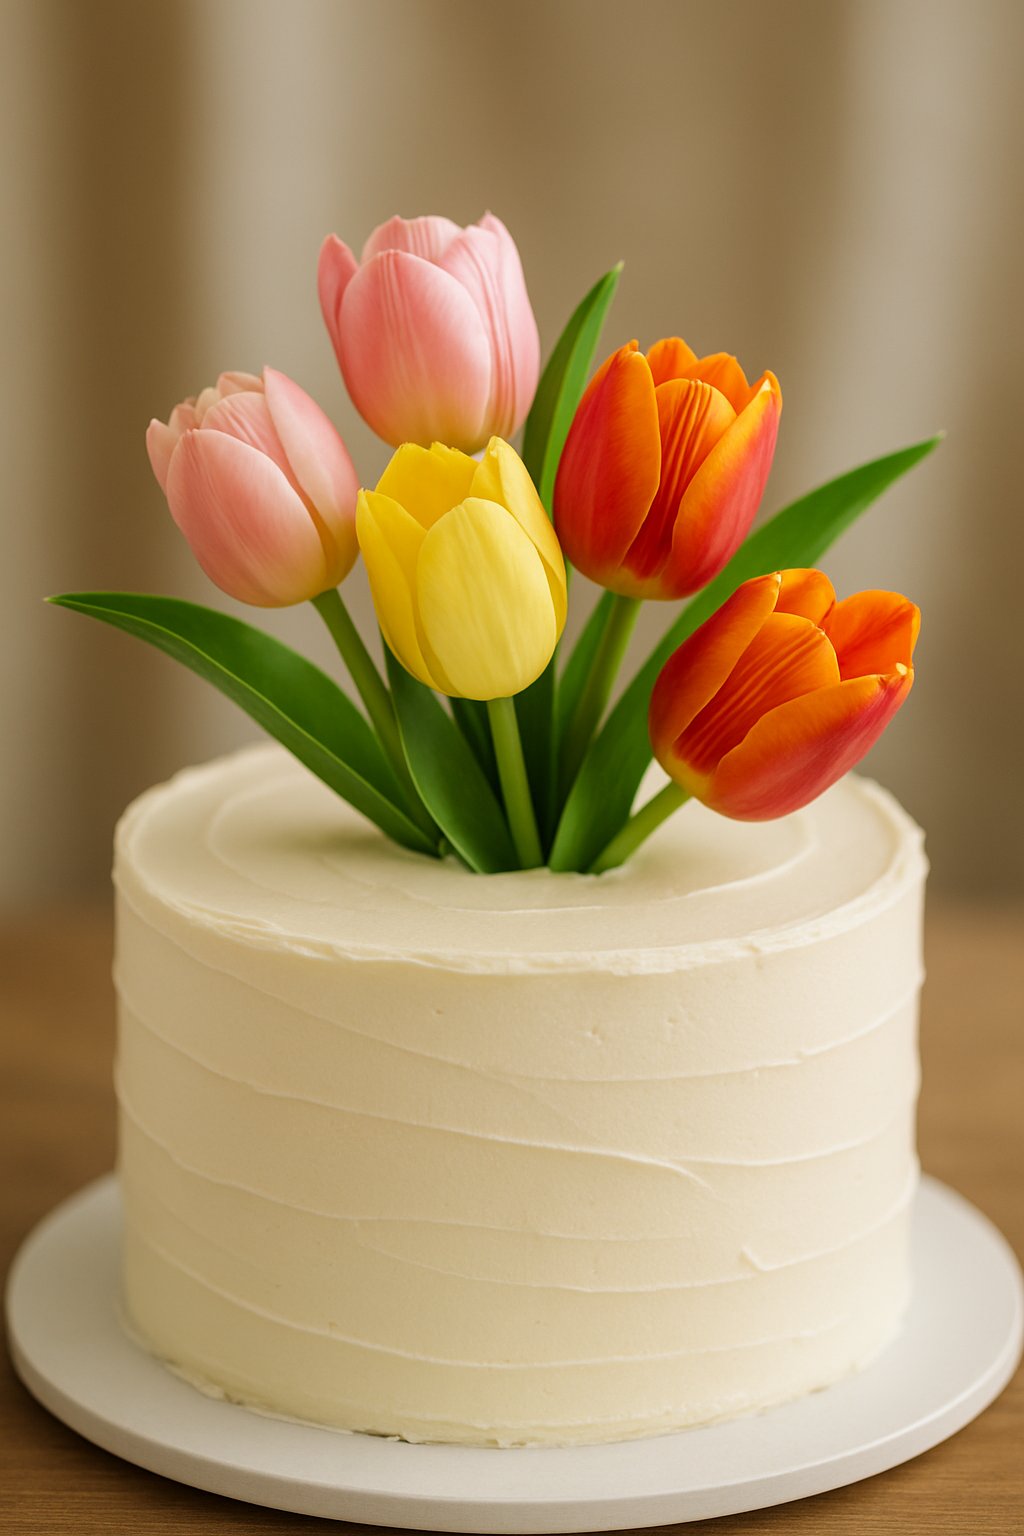
Fresh tulips on a cake? Absolutely. They add a real burst of spring.
Pick tulips with bright petals and sturdy stems. Give them a gentle wash and dry so there’s no dirt or bugs lurking.
After the cake’s frosted and cooled, arrange the tulips on top. Try a single bloom in the center or cluster a few together for more drama.
Let the stems lie flat, or trim them if you want the flowers to stand upright. Both ways look great, honestly.
For tiered cakes, tuck tulip bunches between layers for extra color. Even three tulips on a small cake can look lovely.
Wrap the stems in plastic so they don’t touch the cake directly. It’s a little extra effort, but worth it.
Stick with classic tulip colors or go all-white for something understated. Keep the cake in the fridge so the flowers stay perky until serving time.
Tulip Silhouette Cake Wrap
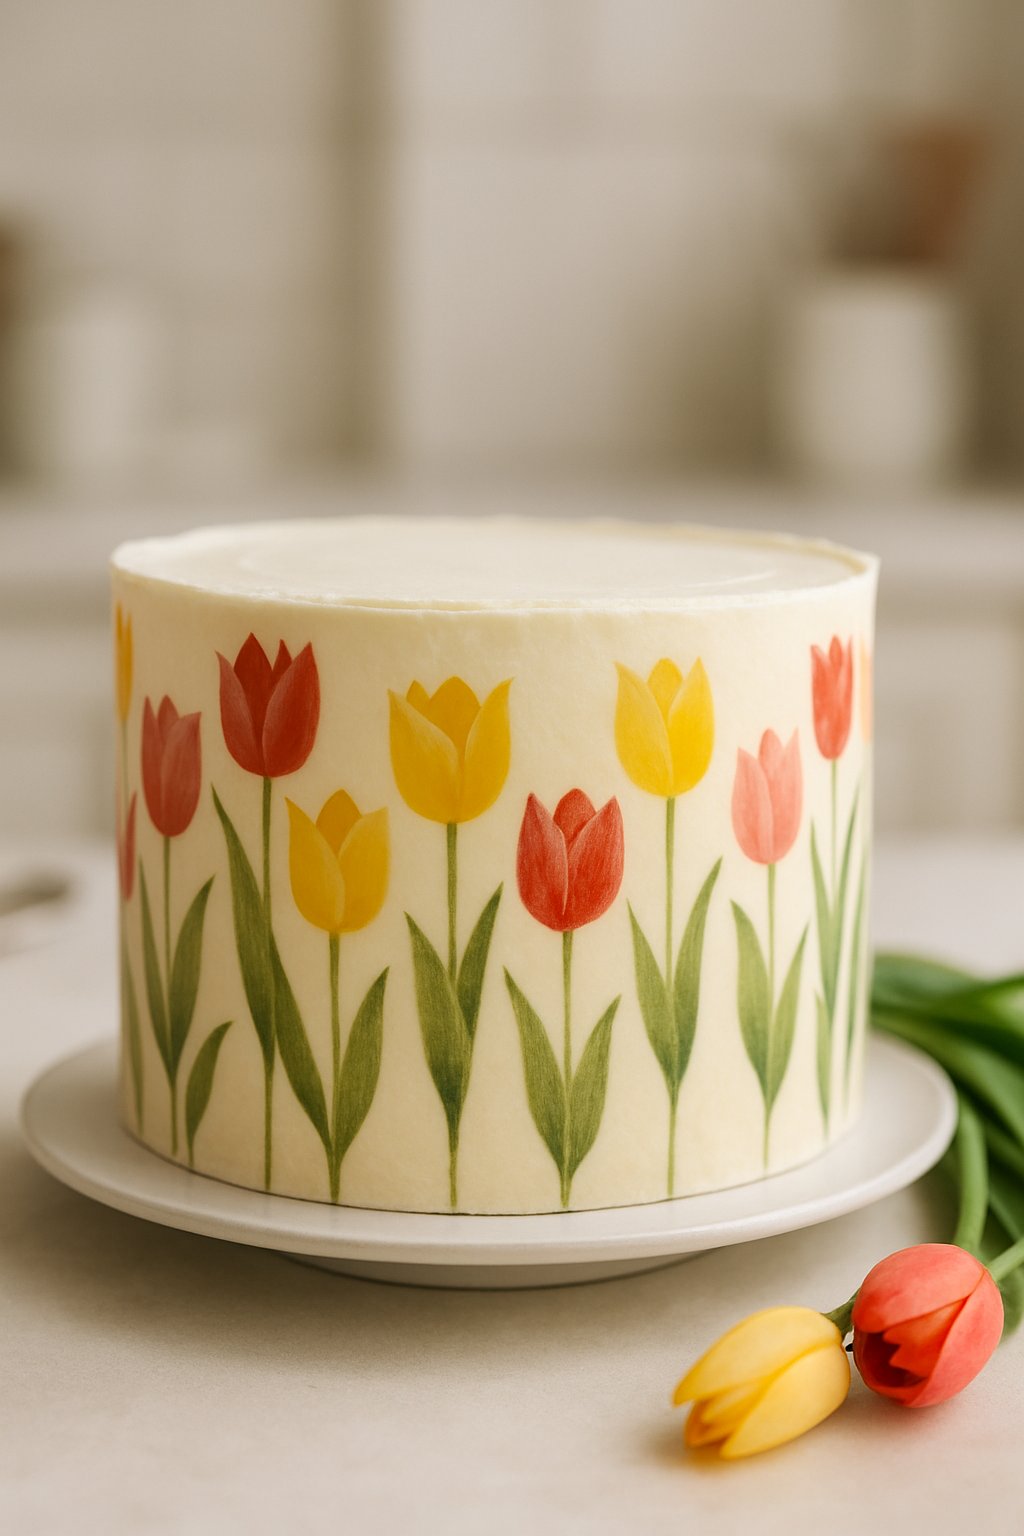
For a modern tulip cake, try a tulip silhouette cake wrap. Bake your cake in any shape—round, square, even mini cakes work.
Cut a strip of edible wafer paper, fondant, or chocolate to fit around the cake. Use a craft knife or cutter to make tulip silhouettes along the top edge.
Keep the tulips simple or go detailed if you’re feeling confident. Wrap the strip around the frosted cake and press it gently so it sticks.
Choose contrasting colors for a bold look, like white cake with a bright tulip wrap. It really makes the design pop.
This style works for single and multi-tiered cakes. You can make each tier a different color or keep them matching for a cleaner vibe.
Add thin green stems if you want, or just leave the tulips as bold outlines. Both options have their own charm.
Tulip Patterned Fondant Drapes
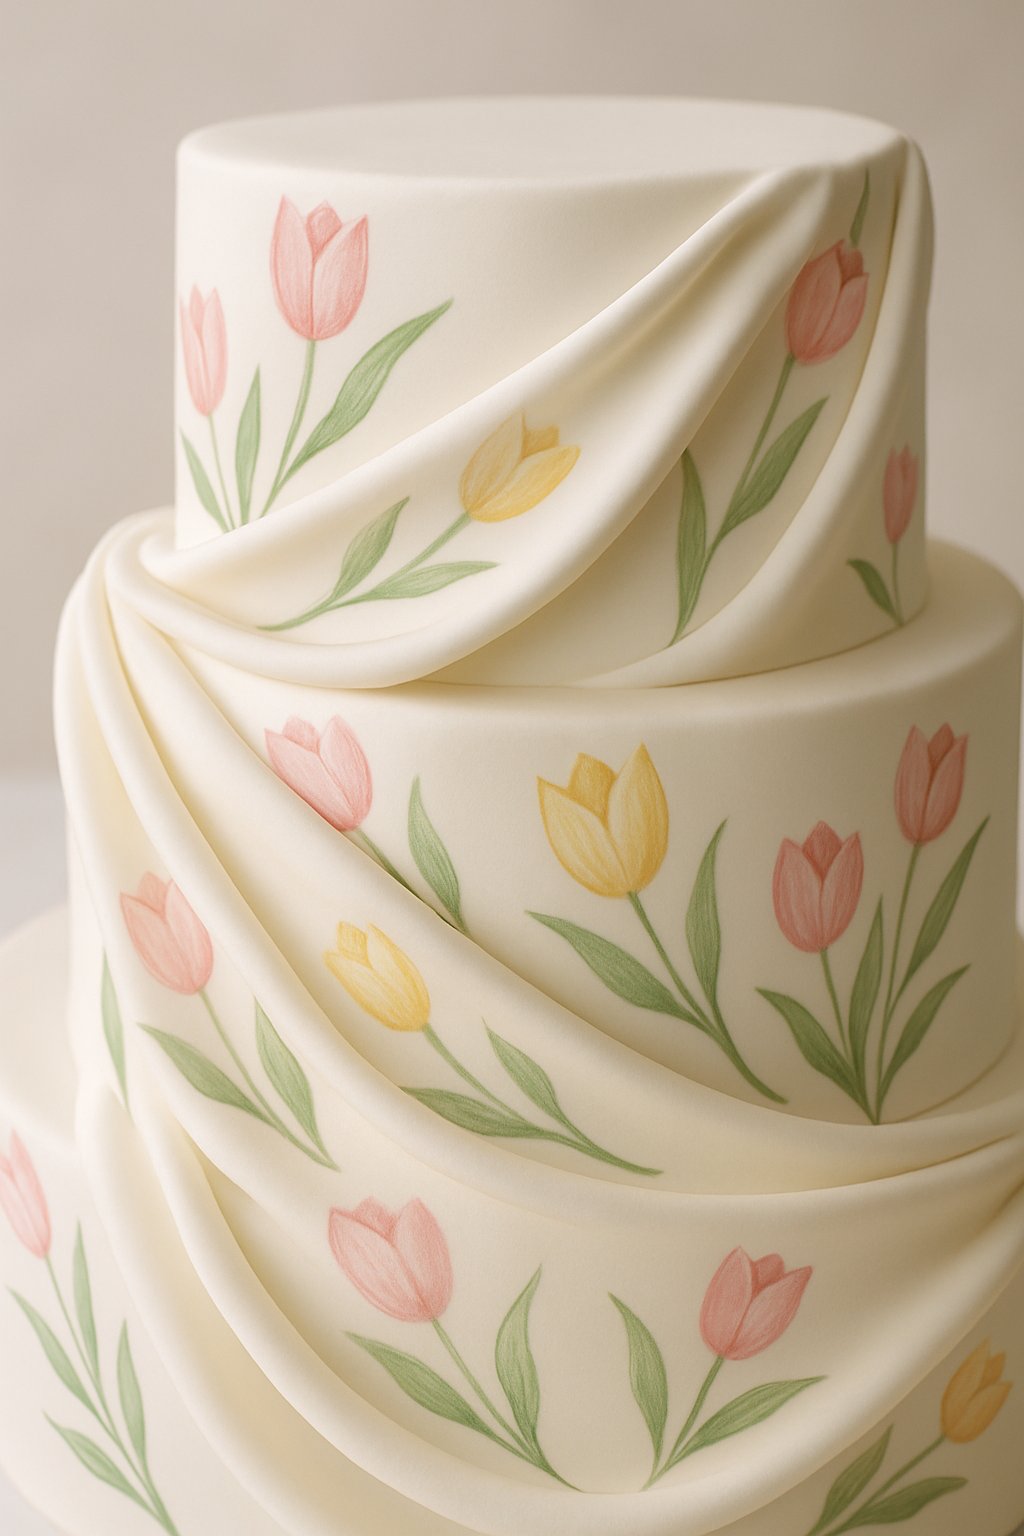
Fondant drapes with tulip patterns give your cake a unique, soft look. Start by rolling out fondant into thin sheets.
Cut the fondant into long strips and drape them gently along the cake’s sides. Use food-safe tools to imprint tulip shapes on the fondant.
Press small petals or full tulip outlines evenly across the surface. Go for pastel colors like pink, yellow, or purple for a spring vibe.
Layer the drapes on one or more tiers, overlapping the strips just a bit for a natural look. You can paint in the stems and leaves with edible color for extra detail.
Mix different sizes of tulips for more variety. This keeps the design from feeling too stiff or repetitive.
Buttercream Tulip Bouquet Cluster
Piping a buttercream tulip bouquet cluster is fun and looks impressive. Pick two or three colors so your tulips look fresh and lively.
Use a tulip piping tip for neat petal shapes. Practice helps, so don’t stress if the first few look weird.
Arrange tulip clusters in one spot or across the top for a bouquet effect. This works on cakes of any shape, really.
For bigger cakes, add more clusters to fill up the space. If you’ve got tiers, try placing clusters on each one for a cascading look.
Pipe in some small buttercream leaves to help the tulips stand out. Keep the bouquet tight for that lush, blooming vibe.
Testing your piping on parchment paper first makes things less nerve-wracking when you move to the real cake.
Tulip Veining with Edible Ink
Make your tulip cake designs pop with fine lines using edible ink. Start with fondant or gum paste tulip petals on your cake.
Grab a thin edible ink pen and draw subtle veins along each petal. Keep the lines soft—don’t go too dark or heavy-handed.
Natural tulip veins run from the base out toward the tip, so follow that direction. It’s a small detail, but it really adds realism.
Mix veined petals with plain ones for a balanced look. You can use different ink colors to match the tulip shades you’ve chosen.
Try this on single-tier cakes or add it to multi-tiered designs. Even a few veined tulips give your cake extra depth and interest.
Fundamentals of Tulip Cake Decoration
Tulip cakes use unique piping and bright colors to create lifelike flowers on any cake. Getting the basics right makes your tulip decorations stand out.
Understanding Tulip Piping Techniques
Use a tulip piping tip or petal tip for more control. Hold the bag at a 90-degree angle to the cake and squeeze, then release for crisp petals.
Practice keeping even pressure so both sides of the tulip look balanced. You can pipe blooms directly onto the cake or on parchment first if that feels easier.
Start petals at the base and turn the cake as you go to stack them neatly. Don’t crowd the tulips too much—give them some space.
Mix small, medium, and large tulips for a natural effect. Clean your tip often so the details stay sharp.
Choosing Vibrant Color Palettes
Tulips come in pink, red, yellow, purple, orange, and white. Use gel food coloring for vivid buttercream that keeps its shape.
Mix two or three shades per tulip for depth. Here’s a handy color palette for tulip cakes:
| Main Color | Accent Shade | Greenery Tone |
|---|---|---|
| Pink | Fuchsia | Soft Sage |
| Yellow | Peach | Bright Green |
| Purple | Lavender | Olive |
| Red | Coral | Emerald |
Add lighter or darker shades to the petals for more detail. Pair bold tulip colors with a neutral cake base—white, cream, or soft gray—to make the flowers pop.
Finish with realistic leaves or a few small buds using a leaf tip. It’s those little touches that pull the whole look together.
Troubleshooting Common Tulip Cake Decorating Issues
Tulip cakes can get tricky if petals lose shape or the buttercream gets too soft. Here’s how to fix those common problems.
Preventing Petal Shape Distortion
If your tulip petals look flat or squished, check your piping pressure. Hold the bag straight up and squeeze evenly.
Turn the cake stand as you pipe so petals stay lined up around the center. It feels awkward at first, but you’ll get the hang of it.
Temperature really matters. If it’s warm, petals might droop or melt. Chill your cake for 10–15 minutes before piping, and pop your piping bags in the fridge if the frosting softens.
Use a petal tip for crisp edges. If petals spread too wide, try less pressure and a smaller tip opening.
Practice on parchment paper before you start on the cake. It’s less stressful and helps you control the shape better.
If petals start to droop, pause and cool your tools and frosting. Wipe your piping tip often—leftover buttercream can smudge new petals.
Keep a damp cloth handy for quick cleaning. Little things like that make the whole process smoother.
Maintaining Buttercream Consistency
Buttercream that’s too soft just won’t hold petal shapes. If it’s too stiff, piping delicate tulip designs gets pretty tough.
Grab a spoon and test your buttercream—does it droop after you shape it? Toss in a bit more powdered sugar if it does.
When your buttercream feels gritty or cracks while piping, it’s probably thirsty for a touch of milk or cream. Add just a teaspoon at a time and see how it goes.
Mix your buttercream until it’s smooth and lump-free. That part’s non-negotiable.
Cover your bowl with plastic wrap, or you’ll end up with crusty frosting. If you’re going for a bunch of tulip petals in lots of colors, split your buttercream into smaller bowls.
Only color what you need for each batch. That way, the rest stays fresh and ready to go.
Working in a warm room? Pop your decorated cake in the fridge to help set the petals as you work.
If you’re aiming for detailed tulip cakes, try working in short bursts. Chill your cake between layers of piping—it’s the trick for keeping every flower clean and sharp.