17 1970s Mod Retro Cake Design Ideas
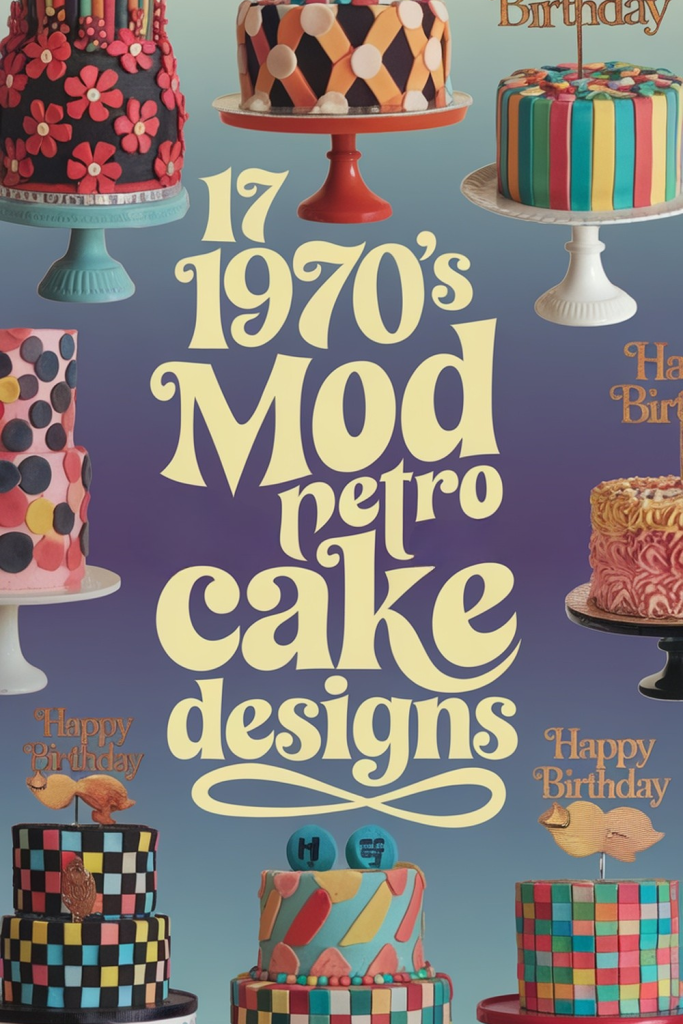
17 1970’s Mod Retro Cake Designs for a Groovy Celebration
If you love bold patterns and bright colors, the retro style of the 1970s may inspire your next cake creation. This fun and playful look often features unique shapes and eye-catching designs that stand out at any celebration.
You can find new ideas and bring a vintage feel to your parties by exploring these 1970’s mod retro cake designs. Whether you enjoy baking for birthdays or just want something different, these styles offer lots of creative options.
Bold Geometric Patterns

When you think of 1970’s cakes, bold geometric patterns might come to mind. Bright shapes and lines are a big part of retro cake style. Squares, circles, and triangles, stacked or sprinkled, make a cake stand out right away.
Using sharp edges and strong colors is one way to get that true mod look. Contrasting shades like orange, green, yellow, and brown work great together. Try layering fondant in blocky shapes or piping icing in zigzags and dots.
You don’t have to cover the whole cake with patterns. Sometimes adding a few large geometric shapes on top or the sides is all you need. Even repeating a simple design, like straight lines or polka dots, makes a big impact.
Some people like arranging basic shapes in a repeated pattern, almost like tiles. Others stack circles or stripes diagonally, giving the cake a playful twist. There are many ways to use these shapes, so you can make your design your own.
Geometric cakes can fit any party or celebration. You can choose colors to match your theme. You might want sharp rectangles for a modern look, or go with wavy lines for a softer, groovier vibe.
Simple shapes are easy to cut out, so you don’t need fancy tools. Just roll out fondant or use a steady hand with buttercream. You can get creative with cookie cutters or a ruler for crisp, clean edges.
Let your imagination lead the way. Mix and match patterns until you find something you like. With bold geometric patterns, your cake will always look fresh and fun.
Psychedelic Swirl Icing
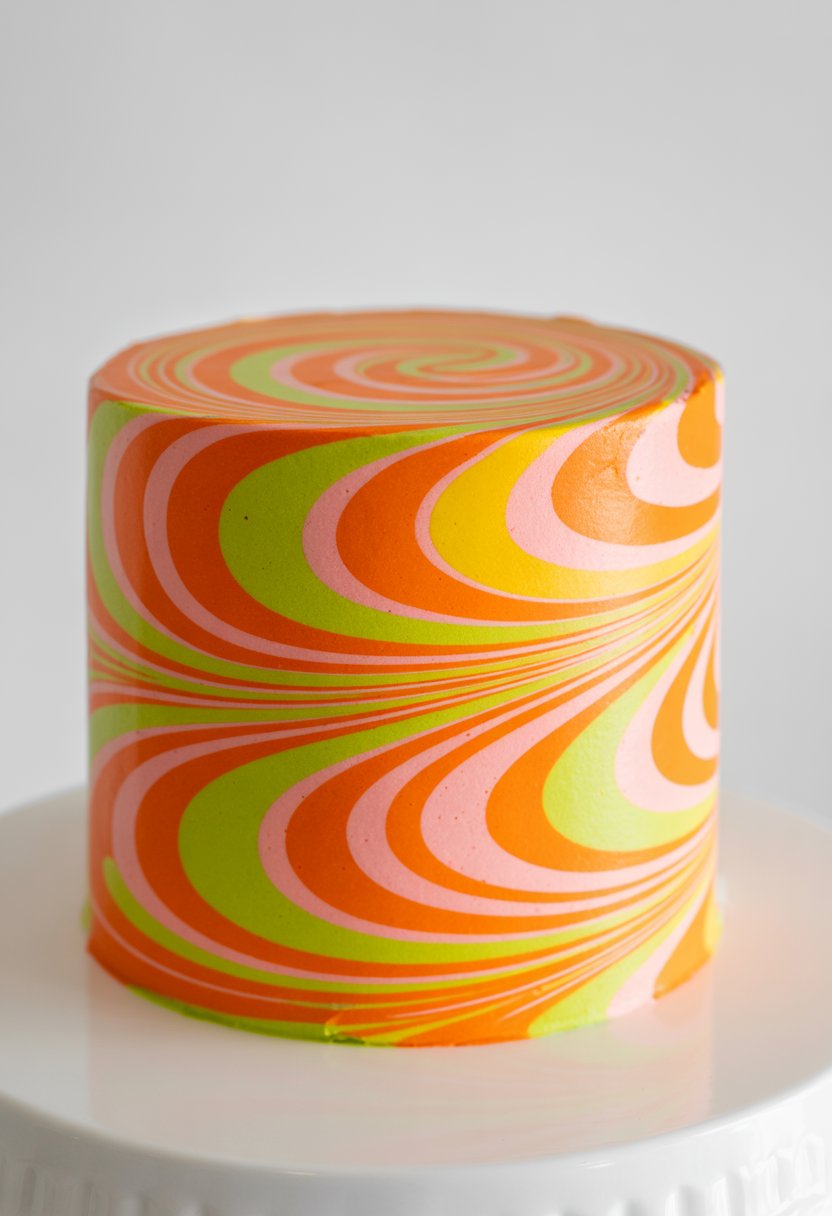
Psychedelic swirl icing is all about bold color and movement. This cake style became popular in the 1970s. You might recognize it from posters and clothes with similar wild, swirling patterns.
To create this look, you use several bright colors of icing. Usually, you pipe or spread different colors right next to each other. Then you drag a toothpick or knife gently through the icing to make swirls.
Choose colors like neon pink, electric blue, sunny yellow, and grassy green. The more vibrant, the better. Don’t worry if your swirls aren’t perfect—the charm comes from the mix of patterns.
You can put these swirls on the tops and sides of cakes. Cupcakes work well for this design too. The key is not to over-mix, or the colors will blend and get muddy.
Finish your psychedelic swirl with simple decorations. Colored sugar or a few sprinkles keep the focus on the icing art. If you want, add a few flowers or round candies, but not too many.
This mod retro look is bright, fun, and eye-catching. It’s a great choice for birthdays or themed parties. Even if you’re new to cake decorating, you’ll find it easy to make your own groovy designs.
Color Block Fondant Layers
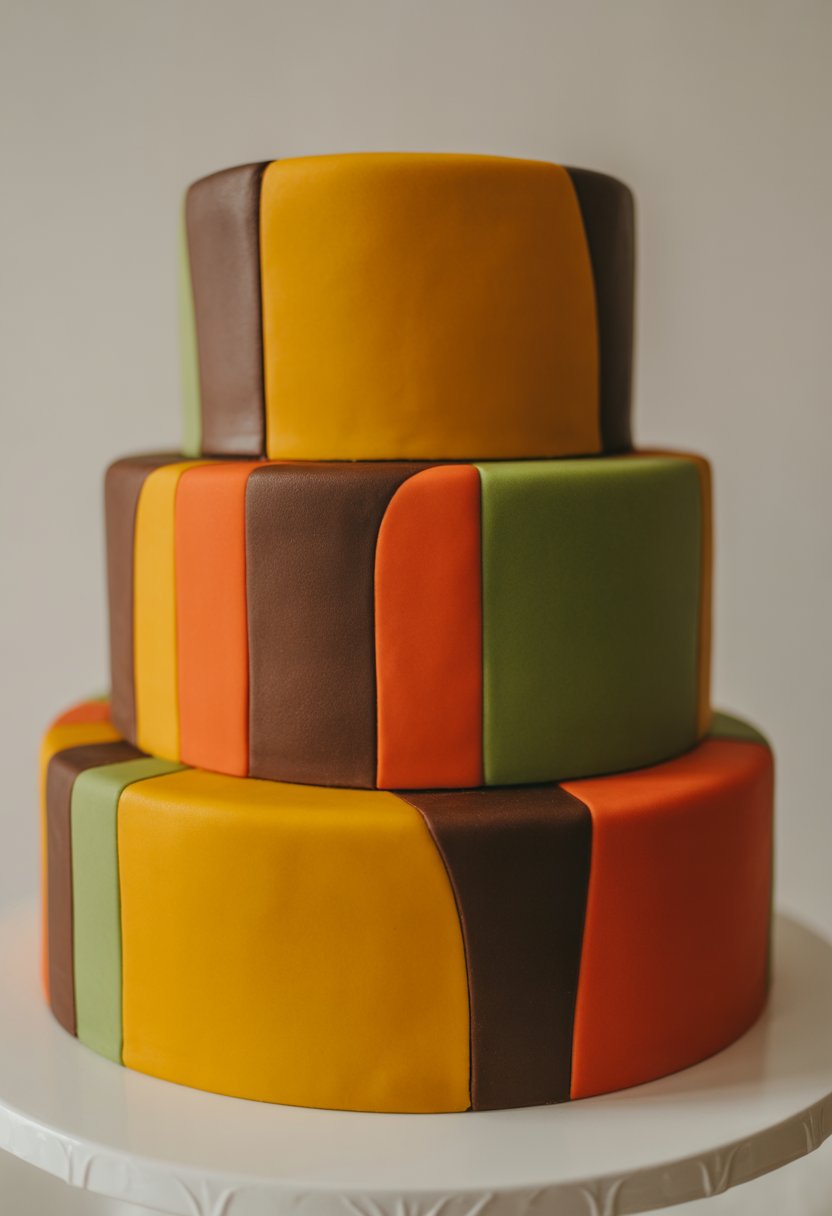
Color block fondant cakes were a bold trend in the 1970s. You can use bright, contrasting colors to create eye-catching shapes. Each layer can be covered with a different shade, from sunny yellow to deep teal or bright red.
To get the look, use fondant rolled out in separate colors. Place the fondant onto the cake so that the edges meet cleanly. Straight lines and sharp corners help create that true mod style.
Try using rectangle or circle shapes for extra flair. You do not need fancy tools—just a steady hand and a bit of patience. Sometimes, a simple ruler helps you make straight edges.
If you want a playful vibe, mix in unexpected color combos. Think orange and purple, or pink and lime green. The goal is to create a fun, retro feel with every slice.
Some bakers add small fondant circles or squares on the cake after layering. These give your cake even more character. Keep the base smooth so the color blocks stand out.
It is okay if your first try is not perfect. The 1970s style was all about experimenting and having fun. With practice, your color block cake will look bold and unique.
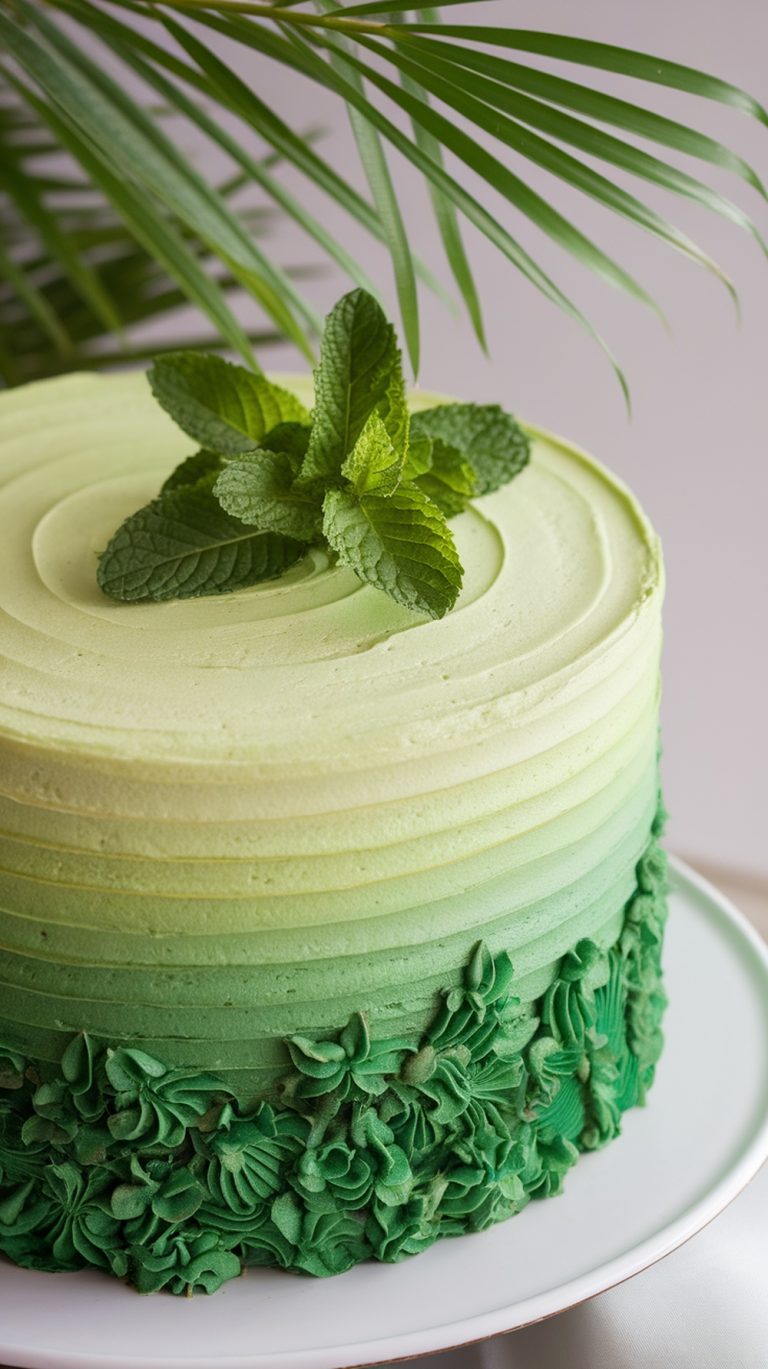
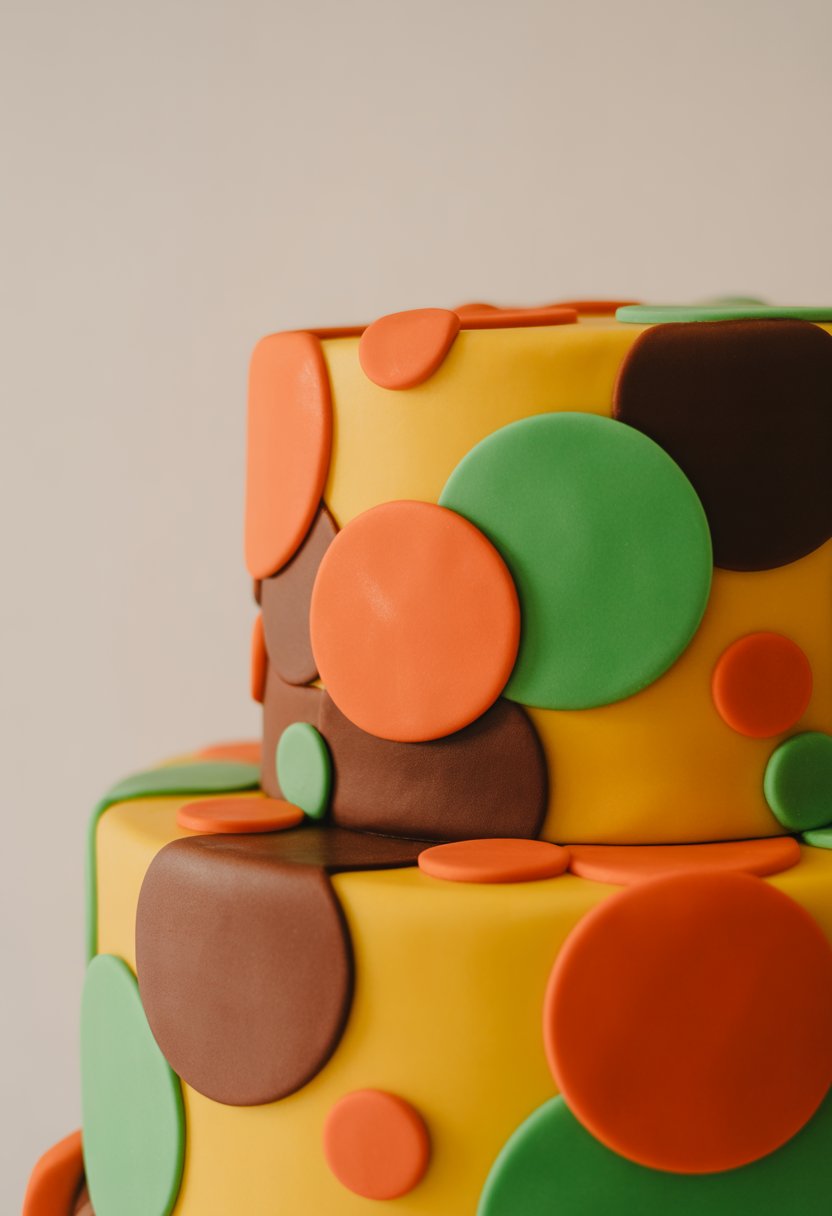
Orange and Brown Earth Tones
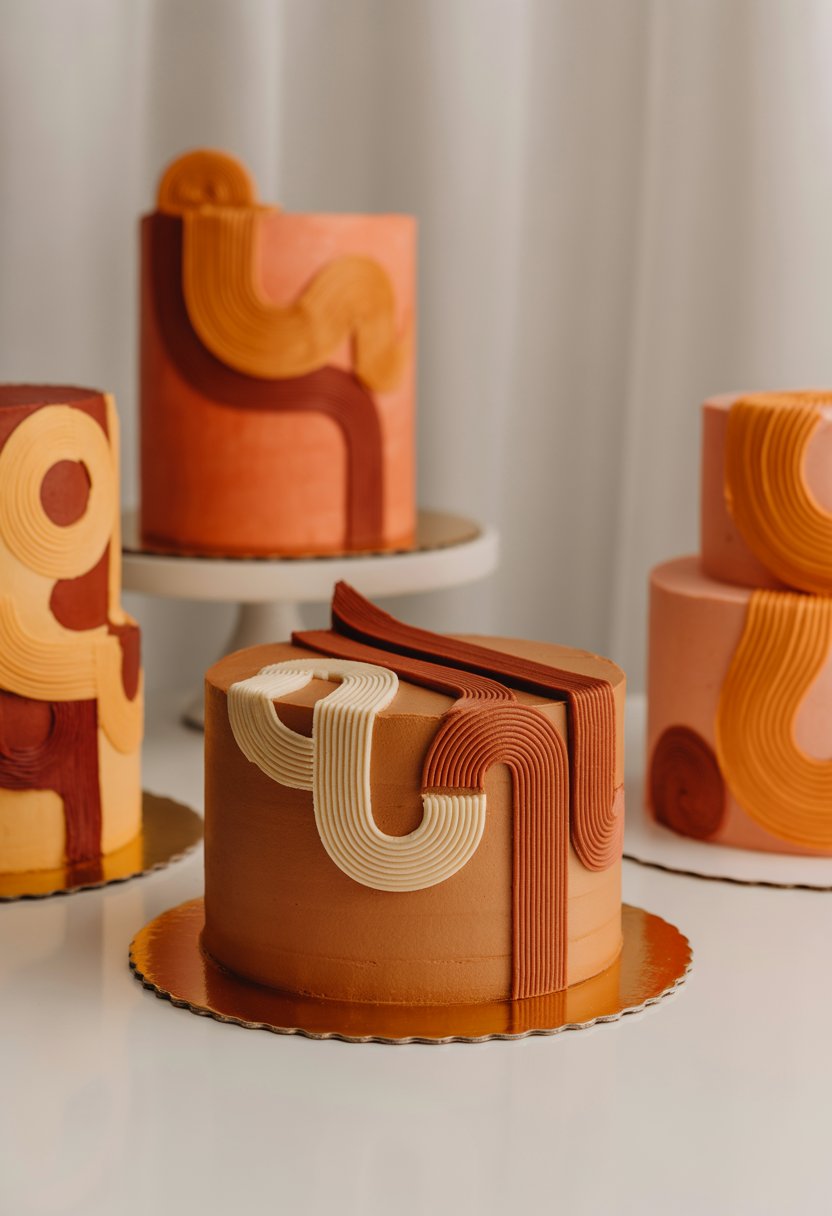
Orange and brown were big colors in the 1970s. You often see these shades in vintage home décor, clothes, and art from that time. When you use them on cakes, you create a classic retro feel right away.
To make a cake with earth tones, try using orange icing with chocolate or caramel accents. You can also add layers of orange, tan, and brown for a striped look. These soft, nature-inspired colors work well for both simple and bold designs.
For decorations, add dots, stripes, or flower shapes with orange and brown frosting. Use round or wavy lines to keep the style playful and fun. You might also try adding fresh orange slices or chocolate curls for an extra touch.
You don’t need fancy tools or skills to make these cakes. Basic piping bags and spatulas are enough. The warm earth tones cover small mistakes and help your cake look charmingly retro.
When you serve a cake with these colors, it brings back memories of family parties from the 1970s. The orange and brown color combo feels cozy and inviting, perfect for gatherings or birthdays.
These cakes are a great way to give your desserts a vintage vibe. Try different patterns and color shades until you find one that matches your style. Orange and brown earth tones will always give your cake a touch of classic retro charm.
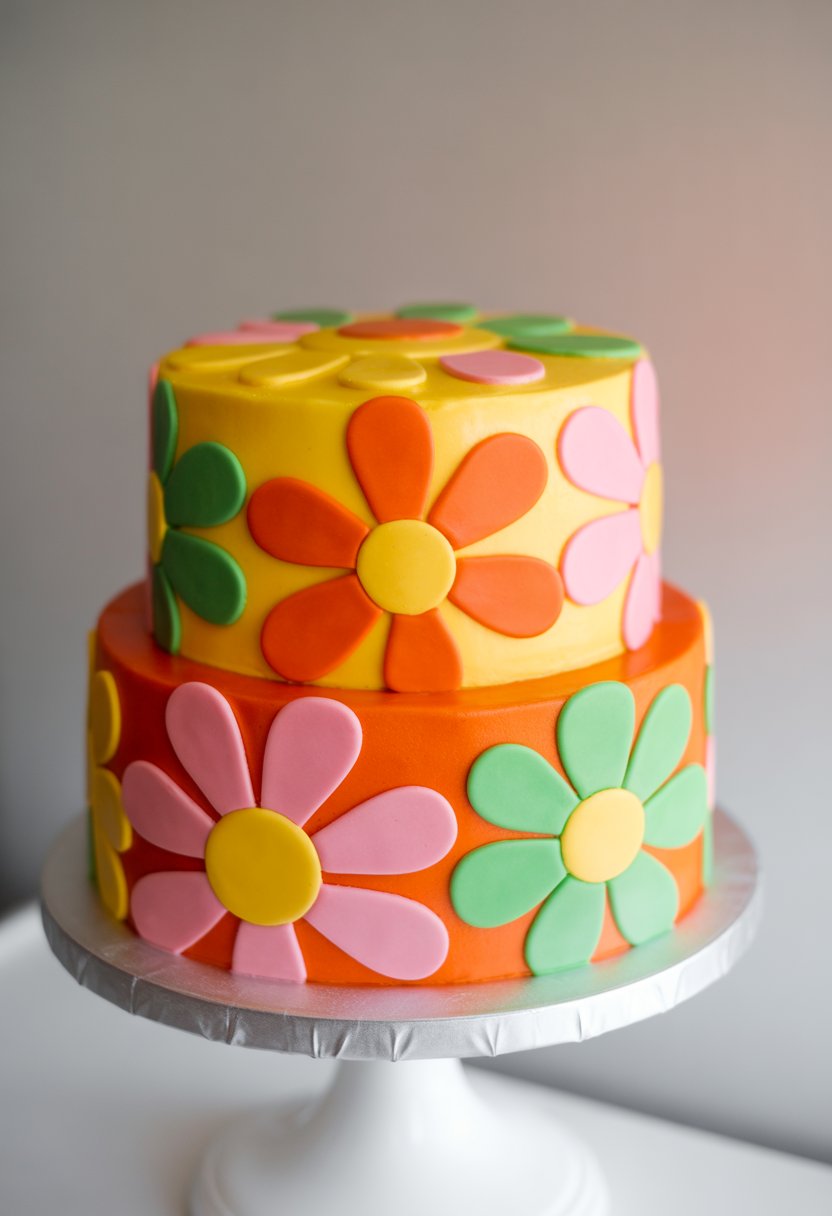
Flower Power Decorations

When you think of 1970’s cakes, big bold flowers come to mind right away. Bright orange, yellow, and pink icing flowers were popular. You can make simple daisy shapes, or go for funky five-petal blooms in rainbow colors.
To get that true retro look, use lots of contrasting colors together. Don’t be afraid to mix green, blue, and purple frosting for flower petals. Add some swirls or dots around the flowers to create that playful style from the past.
Use icing or fondant to create raised flowers for texture. Edible sugar flowers also work if you want something quick. Try placing flowers in circles, or lining them up along the edges of your cake for more of that mod vibe.
You don’t need perfect piping skills. Imperfect, chunky flower shapes actually match the vintage feel. Try stacking smaller flowers on top of bigger ones for a fun 3D effect.
Adding some leaves and stems in between the flowers helps fill in blank spots. You can also use a simple template to keep the shapes even. Spacing your flowers in a repeating pattern makes the design easy to follow and easy to decorate.
For a little extra shine, sprinkle colored sugar or add a few candy beads in the middle of the flowers. This makes the shapes stand out. You can even use edible markers to draw on extra flower details if you want something different.
With just a few colors and a steady hand, you’ll turn your cake into a groovy showpiece that looks straight out of the 1970s.
Mod Daisy Appliqués
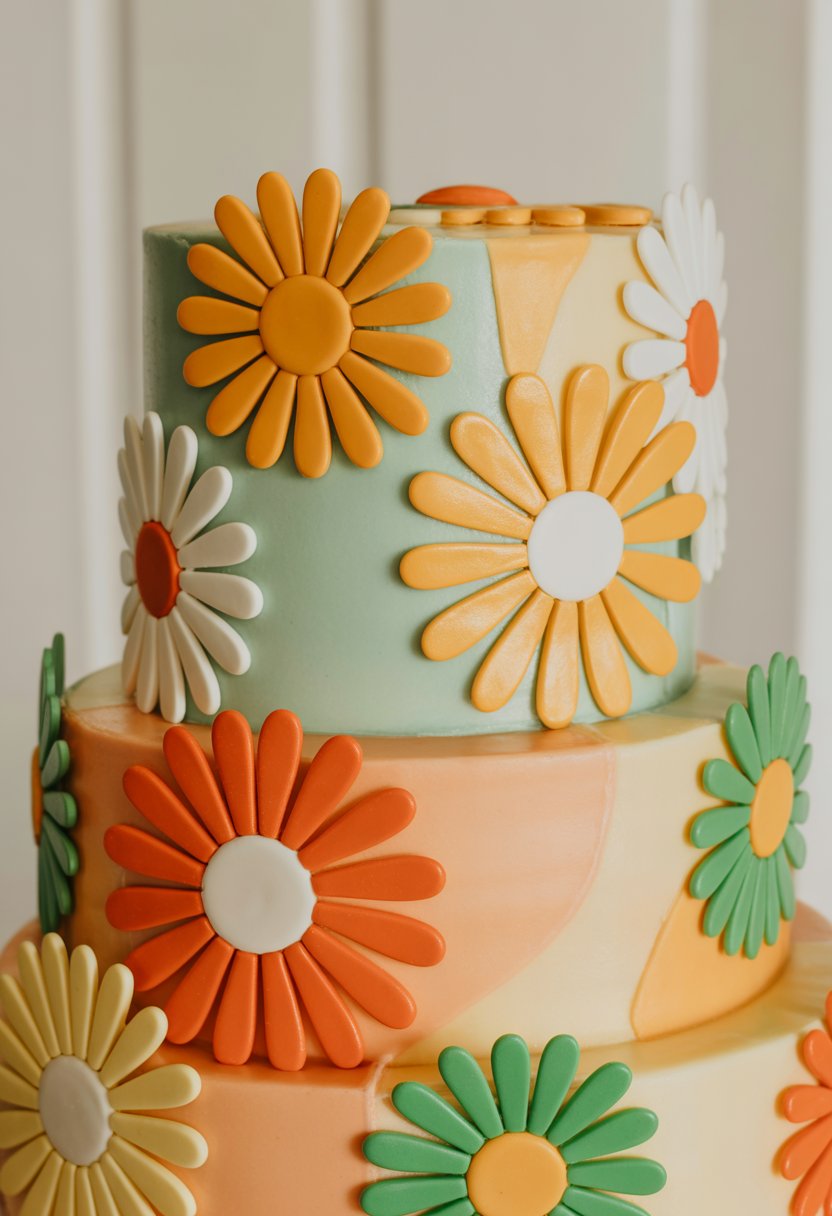
Mod daisy appliqués bring a cheerful, retro vibe to your cakes. These simple flower shapes are easy to make and look bright on any background. You just need a few cutters or even a steady hand with some fondant.
Choose bold colors like white, yellow, pink, or orange for the best ’70s look. Place your daisy appliqués in neat rows or space them randomly for a playful design. No need to add too many other decorations—these flowers make a big statement by themselves.
For a classic touch, use a large daisy in the center of your cake. Smaller daisies can go around the sides, creating a fun pattern. You can even mix sizes for more interest.
Mod daisies work well on both buttercream and fondant cakes. They stick easily and keep their shape. If you want, add a little piped detail in the daisy’s center using contrasting icing.
Try layering two colors for each petal. It’s an easy way to make your appliqués look more three-dimensional. Just roll out two thin sheets of fondant and press them together when you cut the flower.
Mod daisy appliqués fit any occasion. Birthdays, baby showers, and even just-because parties look more fun with this design. Your guests will recognize the throwback style right away.
Don’t worry if your daisies aren’t perfect. Each one can have its own look and charm. That’s part of the retro appeal. Your cake will still stand out with these bright, simple flowers.
70’s Vinyl Record Cake Topper
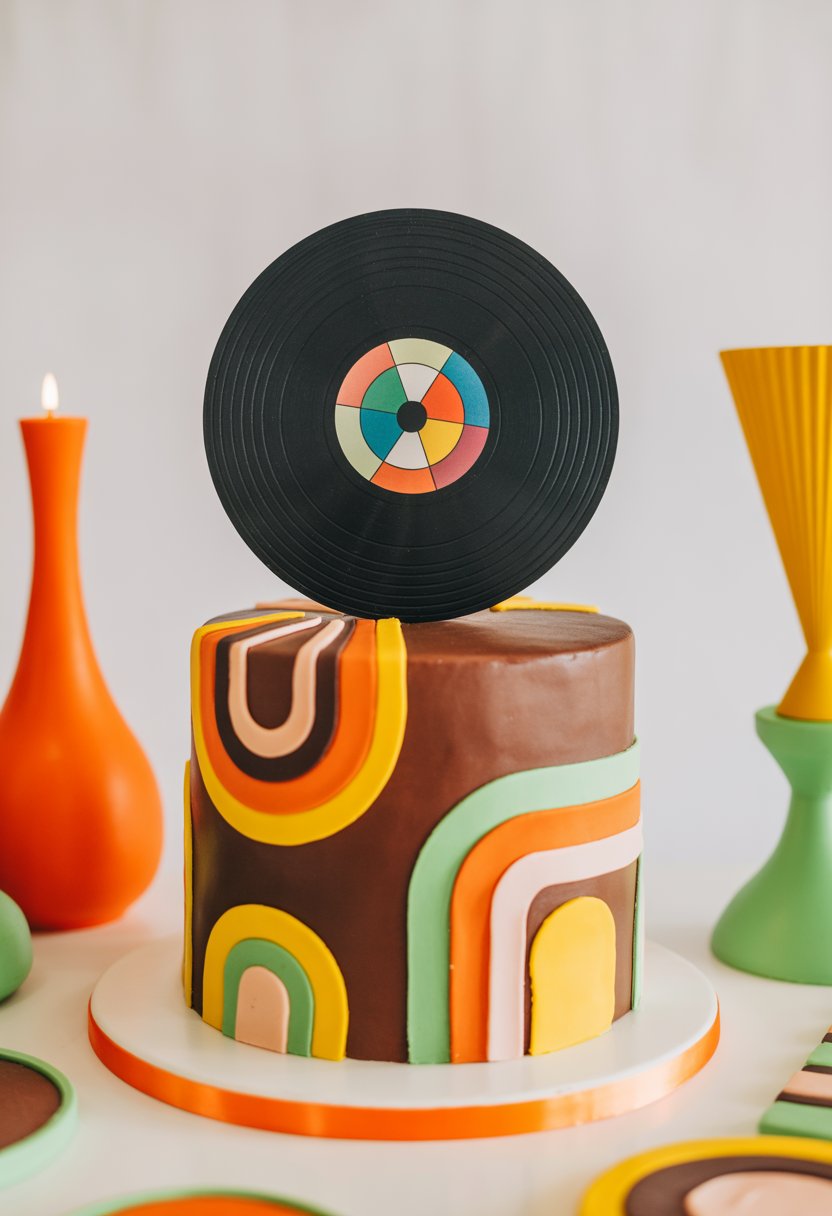
Bring the feel of a groovy dance floor to your cake with a 70’s vinyl record cake topper. This topper is usually shaped like a classic round record and can feature bright, bold colors in the label area. You might see simple details like music notes, colorful stripes, or a famous band name from the decade.
Add your own style by personalizing the label. You can write a short message or the name of the birthday person in a fun, retro font. Black fondant or icing works great for the record itself, while colored fondant makes the label pop.
You don’t need fancy tools for this topper. You can cut the circle from fondant using a cup or cookie cutter. To make it look real, add grooves with a toothpick or butter knife, then place it on top of your favorite cake flavor.
This design works well for both large party cakes and smaller, single-tier cakes. Match the rest of your cake with bright 70’s colors like orange, yellow, or teal for the best effect. Your guests will enjoy the playful, music-inspired vibe the topper brings.
Abstract Pop Art Design

If you want a fun and eye-catching cake, try abstract pop art designs. These cakes use bold shapes, bright colors, and unique patterns. You might see dots, stripes, big blocks, and wavy lines.
Pop art cakes often remind you of comic books or graphic prints. You can use sharp colors like red, yellow, blue, and black to make everything pop. Some cakes even have designs that look like painted brush strokes.
Adding abstract shapes or fun symbols makes your cake look even more playful. Think stars, lightning bolts, or speech bubbles. You can mix and match different patterns all over the cake.
Don’t worry about making everything perfect. The abstract style lets you get creative without following strict rules. You can change the shapes and colors to match your party theme.
Try using fondant, icing, or edible paint to bring your design to life. Piping bags and stencils can also help you create cleaner lines and shapes. Remember, bright and bold is what makes pop art stand out.
If you want to make your cake even more retro, add a touch of glitter or silver candy balls. Some people use comic book words like “POP!” or “WOW!” for extra flair. This adds to the 1970’s vibe and makes your cake really fun.
When you bring an abstract pop art cake to a party, people will notice it right away. It’s a fresh idea that stands out from classic cakes. This style lets you use your imagination and enjoy the creative process.
Checkerboard Fondant Base
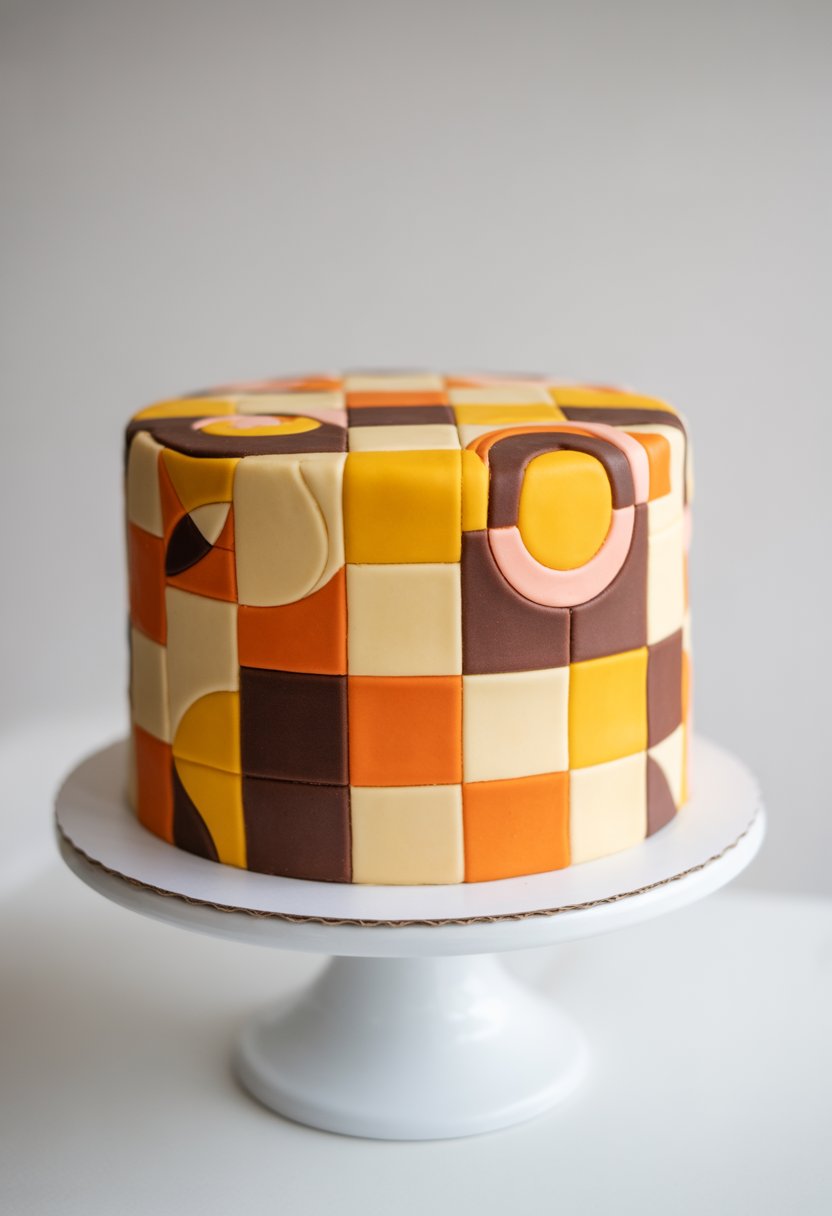
A checkerboard fondant base is a classic look from the 1970s. This design uses squares in two or more colors, usually black and white, to cover the cake. The sharp pattern stands out and gives your cake a bold retro feel.
To create a checkerboard, you start by rolling out fondant in your chosen colors. Use a ruler or a cookie cutter to cut even squares. Try to keep them all the same size so your cake looks tidy.
You can lay the squares flat on top of the cake or wrap them around the sides. Press each piece gently so the fondant sticks to the surface. It helps to use a little water or edible glue.
Feel free to change up the color scheme to fit your party. Bright colors like orange, teal, or yellow can make the checkerboard pattern even more fun. The design works well for both round and square cakes.
Take your time placing each square. The more careful you are, the cleaner your pattern will look. Even if it’s not perfect, the hand-made charm adds to the retro vibe.
Finish your cake with simple accents. A border of fondant balls or piped dots looks great with a checkerboard base. Leave the top open for a fun topper or a message.
This design style is simple but eye-catching. If you like a neat, graphic look, a checkerboard fondant base is a great choice for a 1970s-inspired cake.
Retro Striped Cake Sides
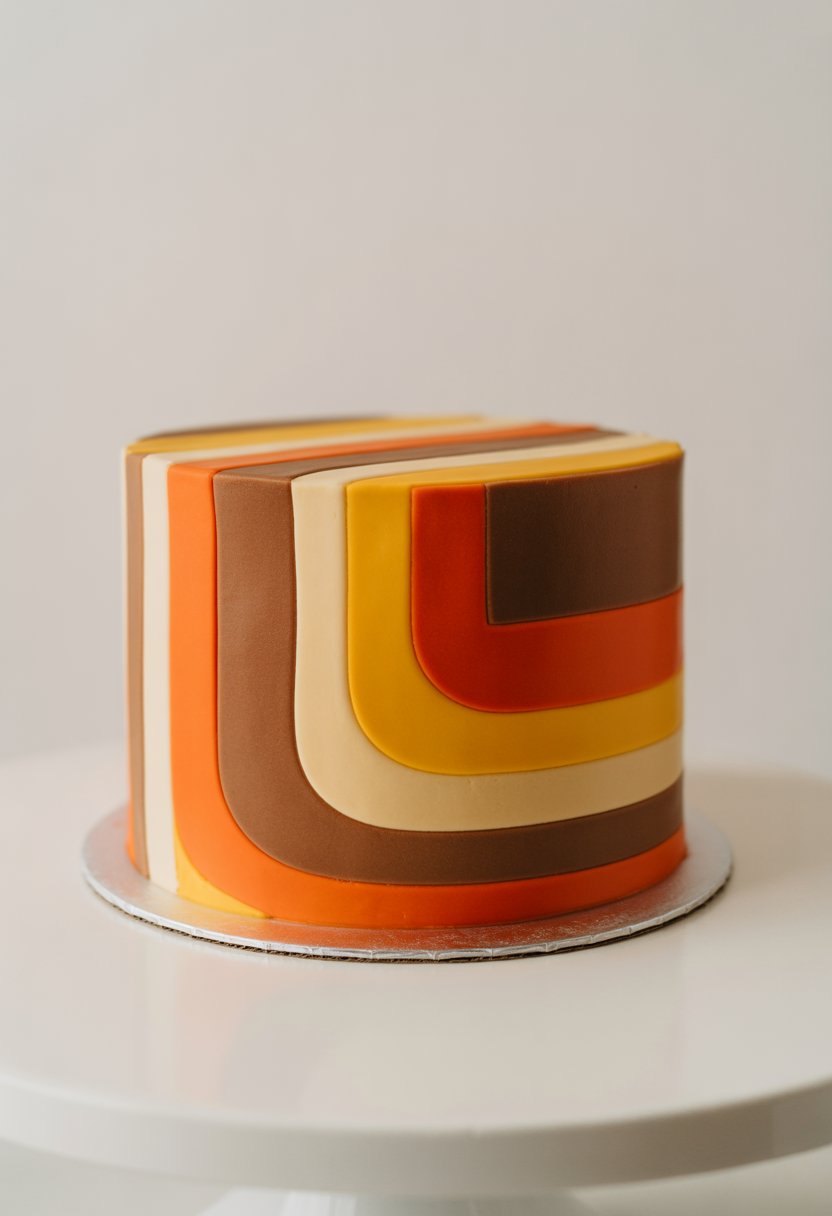
When you think of the 1970s, bold stripes are a big part of the look. You can use wide or thin stripes to wrap around the sides of your cake. Stripes give your cake a fun, eye-catching design.
To make striped sides, start with smooth frosting or fondant. You can use piping bags or strips of rolled fondant in different colors. Try classic ’70s colors like orange, yellow, brown, and teal.
Keep your lines neat for a clean, retro look. If you want, mix vertical, diagonal, or horizontal stripes. Each style brings a different vibe to your cake.
Stripes are easy to match with other decorations. You can add simple dots, starbursts, or a groovy cake topper. The striped sides will help tie the whole retro theme together.
If you want to get creative, try alternating colors or uneven stripes. Pastel or bold colors both work for this look. The pattern can be as bright or as subtle as you like.
Retro striped cake sides are great for birthday parties or just-for-fun baking. They look impressive but are simple to make. Your guests will notice the cheerful, vintage feel right away.
You don’t need special tools for this cake style. Even beginner bakers can try it out. Focus on enjoying the decorating process and have fun with your color choices.
Groovy Peace Sign Toppers
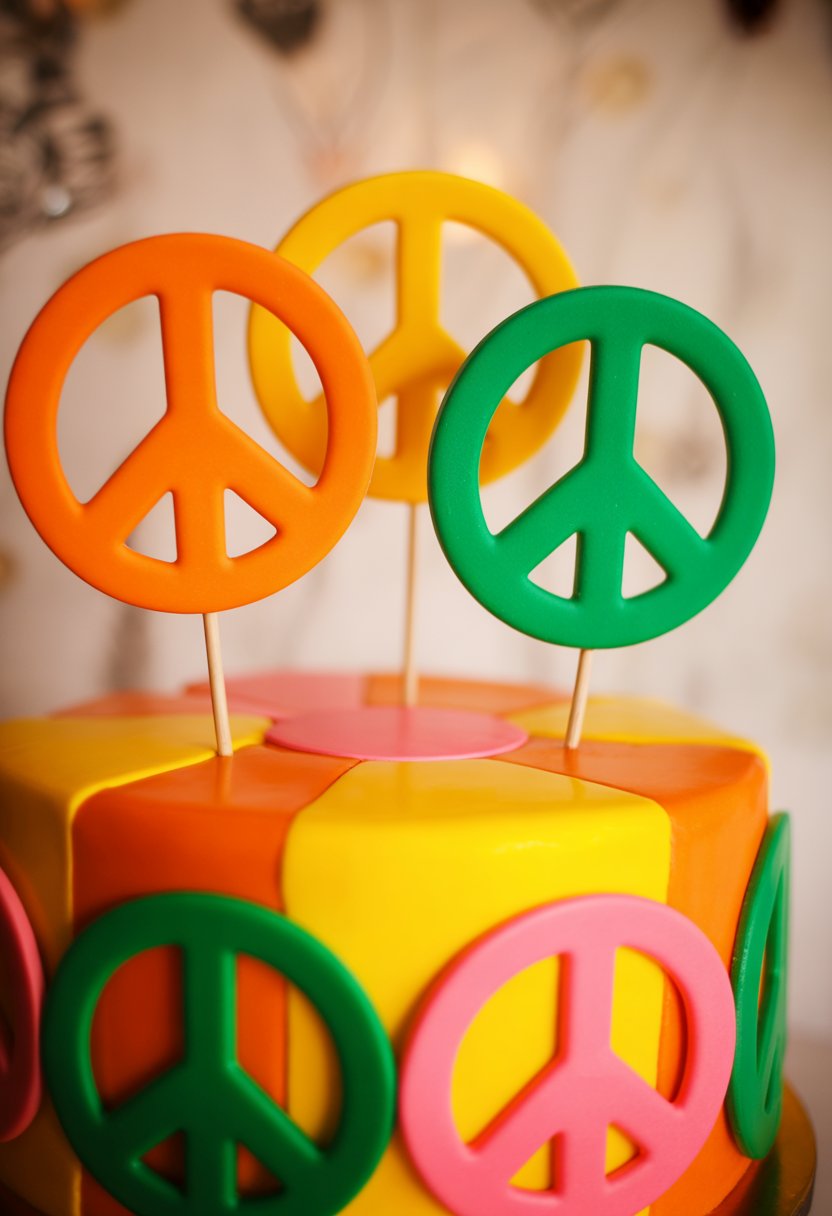
If you want a true retro vibe, peace sign toppers are a fun choice for your cake. These classic symbols were everywhere in the 1970s. They remind people of the peace and love movement.
You can make peace sign toppers using colored fondant or modeling chocolate. Using bold colors, like purple, orange, or neon green, helps your peace signs stand out on the cake.
Cutting out simple circles and adding the familiar peace sign lines is easy. You can use a small knife or even a cookie cutter. Kids can help make these, too.
Stick the toppers on cupcakes or place one big topper on a layer cake. Try arranging several in a circle or pattern for a cool effect. Adding glitter or edible shimmer gives extra sparkle if you want more shine.
Pairing peace signs with matching swirls or flower shapes keeps the look playful. Mix and match different sizes to add more interest.
Even if you are new to cake decorating, these toppers do not take long to make. Peace sign toppers are a quick way to turn a plain cake into something special for your next retro-themed party.
Lava Lamp Inspired Drips
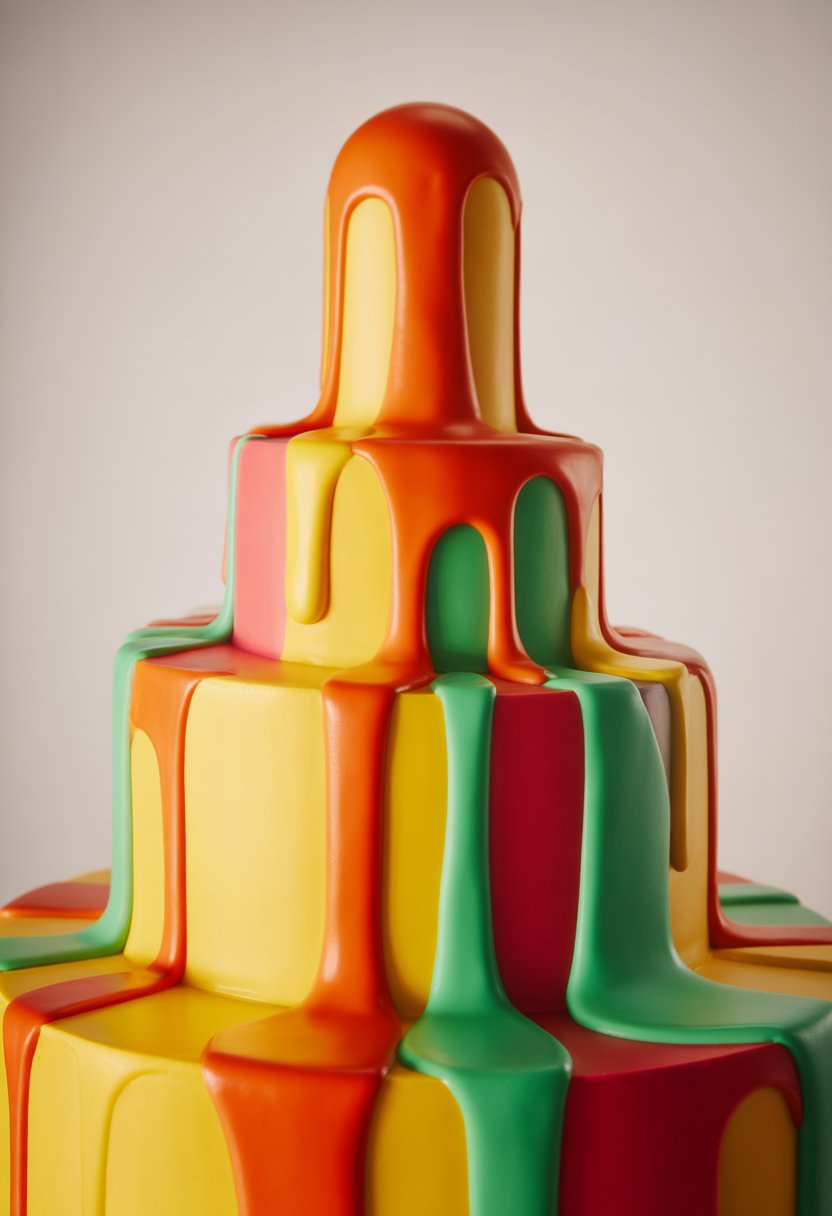
If you want your cake to grab attention, try a lava lamp drip design. Bright, flowing drips look just like the liquid inside a lava lamp from the 1970s. You can pick neon colors such as orange, green, purple, and yellow.
To make these drips, you pour colored ganache along the edge of your cake. Let it slowly run down the sides. This creates the wavy, unpredictable shapes seen in real lava lamps.
You might want to use more than one color for an even groovier effect. Alternate drips or blend two colors together as they run. This will make your cake look extra retro and fun.
Keep the surface of the cake smooth to highlight the drips. It helps if the base icing is a light color so the drips really pop.
This style works for both round and square cakes. Try this design for birthdays or any ’70s themed party. It’s easy to adapt for cupcakes too.
Using shiny, glossy ganache or colored white chocolate helps the colors look bold. You can even add edible glitter for that extra shine. With lava lamp inspired drips, your cake will have a playful and nostalgic flair.
Vintage Disco Ball Elements
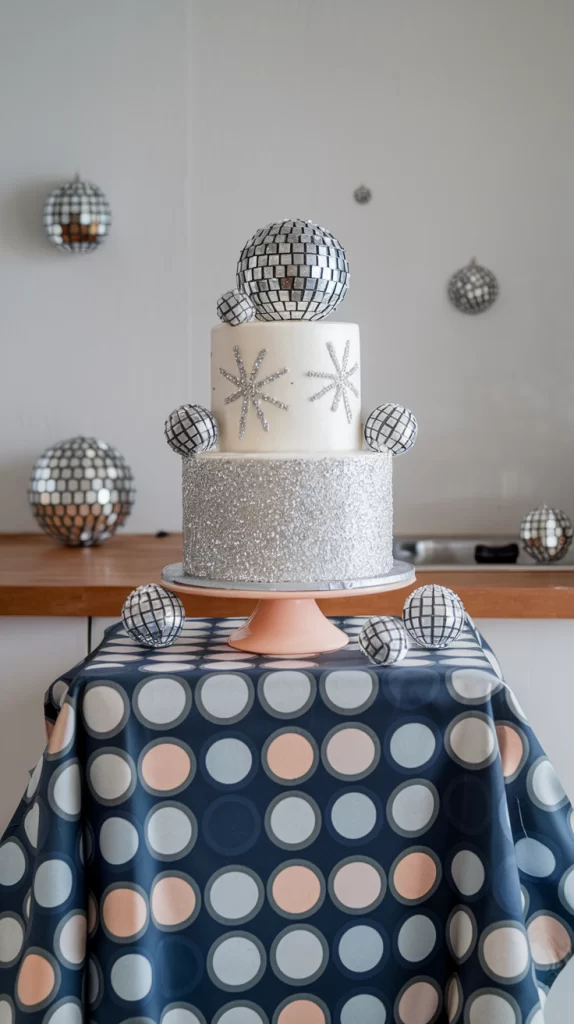
Adding disco ball elements to your retro cake design brings a classic 1970s party vibe. You can use silver fondant or edible glitter to create the look of tiny mirrored tiles. This gives the cake a shiny, eye-catching touch.
You might want to make small disco ball toppers using chocolate or cake pops. Coat them in edible silver paint or shiny sprinkles. Place them on top or around the sides of your cake.
If you want something simple, try adding disco ball patterns with icing. Use a piping bag to make small square shapes in rows on the cake’s surface. Paint them with silver edible dust for extra sparkle.
You can also use disco ball designs for cupcakes. Add mini silver balls or wrap each cupcake in shiny foil. This helps tie the cupcakes into the main cake’s retro vibe.
Don’t be afraid to mix disco ball elements with bright colors. In the 1970s, bold colors and shiny decorations often went together. Mix shades like hot pink, electric blue, or bright yellow with the silver for a true mod look.
Placing a larger disco ball topper on the center of your cake makes a big statement. If you don’t have edible materials, use a clean, plastic disco ball as a fun centerpiece and remove it before serving.
Arrange star-shaped sprinkles around your disco ball details. It brings extra energy and a playful style to your party cake. Keep your design neat so the disco theme stands out.
Using disco ball elements can help your 1970s cake capture the true spirit of the dance floor. Keep your decorations easy to manage, so they are both fun and practical.
Typeface Numbers in 70’s Font
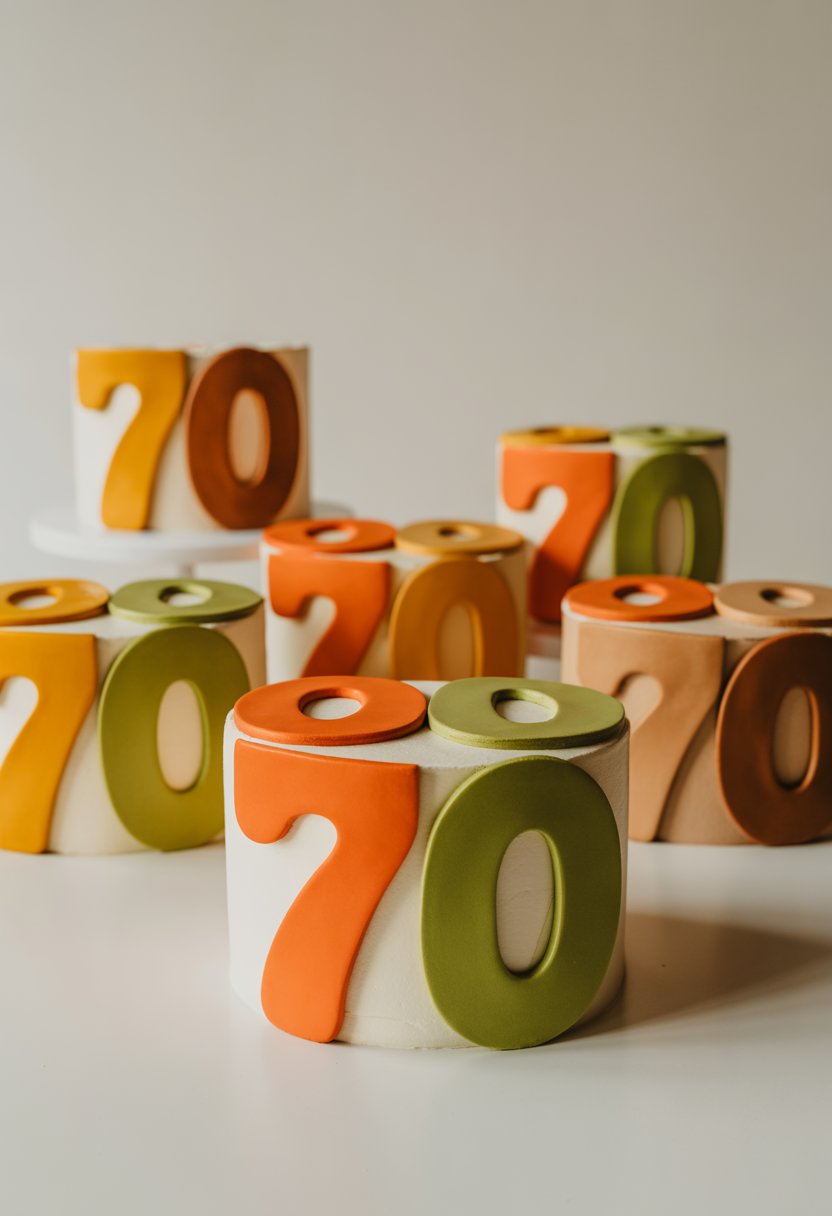
When you think about cakes from the 1970s, the numbers on top often stand out. These numbers usually use a fun and bold typeface from that decade. The look is playful and adds a real retro vibe to your cake.
You can use a thick, bubble-like font to make your numbers pop. Many 70’s fonts have rounded edges and a chunky feel. This makes them easy to read and gives your cake a unique look.
Bright colors like orange, yellow, or purple work great for these numbers. You can use fondant, icing, or edible markers to create them. Some people even use chocolate or candy shaped in a 70’s style font.
Try mixing big numbers with funky patterns like dots or stripes. It helps the numbers stand out even more. You might have seen similar styles on old birthday cards or posters from that time.
If you don’t have a steady hand, you can print out number stencils in a 70’s font. Lay the stencil on fondant or chocolate and cut around it. This is an easy way to get that vintage look without stressing.
Adding these numbers is a great way to finish your mod retro cake. The right font brings out the fun and creative spirit of the 70s. It feels cheerful and instantly reminds people of that colorful decade.
Sunburst Centerpiece Design
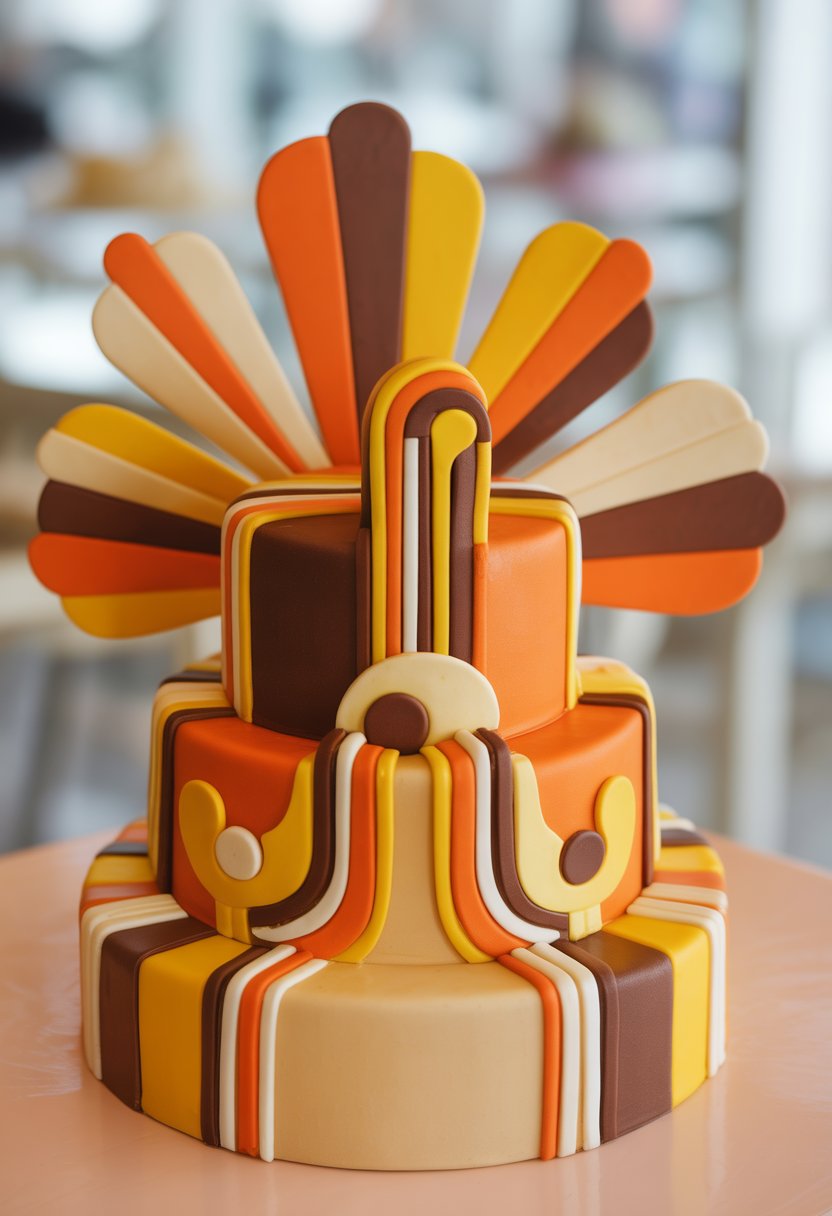
If you want a cake that really feels like the 1970s, try the sunburst centerpiece design. This cake features bold lines spreading out from the center, much like the sun’s rays.
To create the look, start with a circle cake. Use bright icing colors like yellow, orange, and gold. These colors help give the cake its retro vibe.
Draw a circle in the middle using colored icing. Then, add straight lines or “rays” coming out from that center spot. You can make the rays thick or thin, depending on your style.
This design looks best if you keep the lines evenly spaced. If you want, add touches of white or brown for more 70’s flavor. You can use a piping bag, but a simple knife or spatula can also work.
Some people like to add a border of sprinkles around the edge of the cake. This makes the sunburst design stand out even more. You can use round or star-shaped sprinkles.
The sunburst cake is great for birthdays, summer parties, or any fun occasion. It’s a happy and eye-catching cake that is easy to customize with your favorite shades.
You don’t need any special baking tools for this design. Anyone can try it, even if you are new to cake decorating.
If you want extra flair, use candies or fruit slices for added texture. Just place them along the rays or around the edges. This adds more color and fun.
With just a little effort, you can create a cake that stands out and brings a burst of retro style to your table.
Tie-Dye Icing Effects
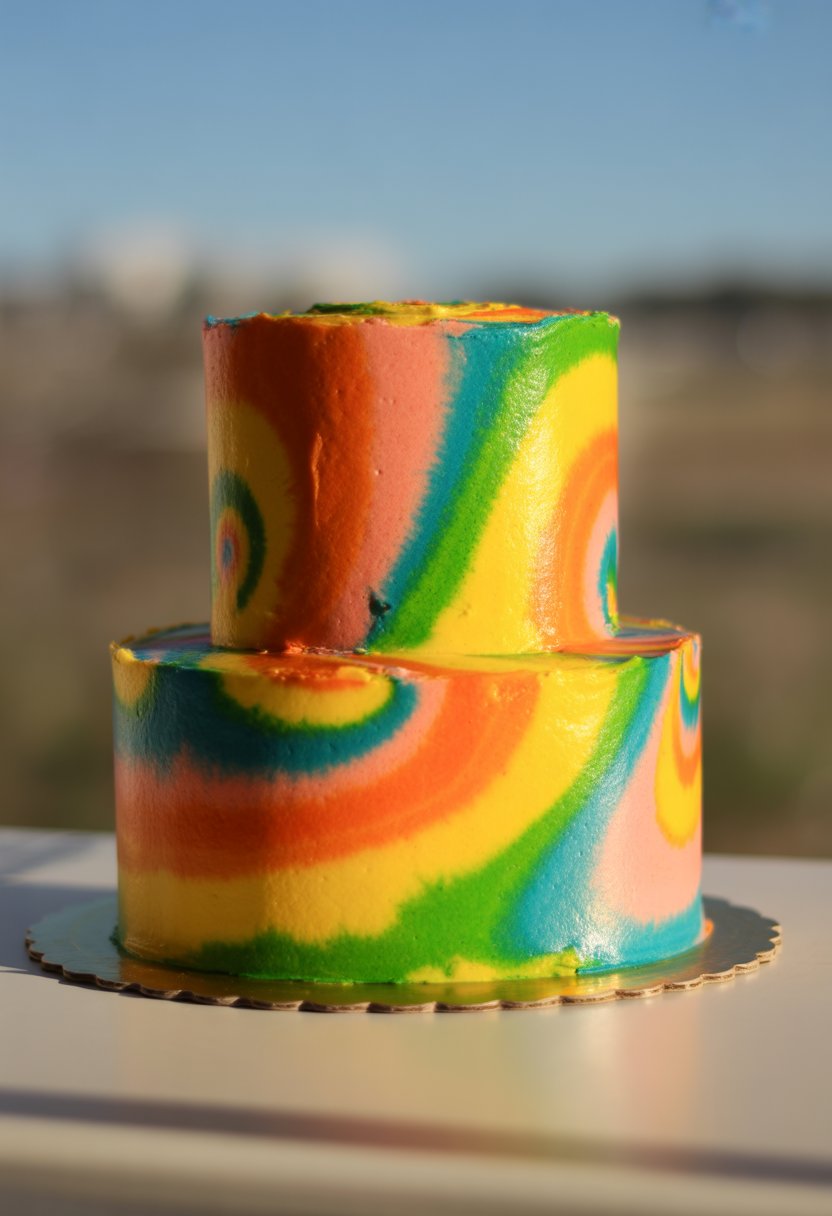
Tie-dye icing effects bring bright, swirling colors to your cakes. This design reminds you of the popular tie-dye shirts from the 1970s. It’s playful and adds a retro touch to any dessert table.
You can create tie-dye icing with just a few simple steps. First, pick 3-4 colors of your choice. Classic combinations like blue, red, yellow, and green work especially well for a mod look.
Spoon blobs of each color onto your cake, keeping them close but not overlapping right away. With a spatula or a toothpick, gently swirl the colors together. Be careful not to overmix so the colors stay bright and clear instead of blending into one.
You can try this effect with buttercream or royal icing. Buttercream is softer and gives a more blended, cloudy look. Royal icing makes the colors look a little sharper and each swirl stands out.
Tie-dye works nicely on layer cakes and sheet cakes. You can do it on the whole cake or just the top. Smaller tie-dye sections also look fun on cupcakes.
For an even more retro vibe, try adding some edible glitter or small candy shapes on top. These little details make your cake feel even more like a piece of 1970s art.
When slicing the cake, each piece will show a different mix of colors. It’s always a surprise and makes serving time exciting for everyone.
Tie-dye icing is easy to try, even if you’ve never decorated a cake before. It’s all about having fun with colors and letting your creativity show.
Polka Dot Fondant Accents
Polka dot fondant accents bring a playful and fresh look to any cake. You can use these colorful circles to create a fun, retro vibe that was popular in the 1970s. Try mixing bold colors like orange, yellow, and blue for that classic mod style.
You’ll start by rolling out fondant and using small cutters or the tops of piping tips to make circles. Arrange them on your cake in neat rows or random patterns. Both styles were popular in retro cake decorating.
For a more modern twist, you can use different sizes of dots. Large and small dots together add extra interest and keep your cake from looking too plain. Stick with two or three colors to keep a clean, vintage look.
Attaching the fondant dots is easy. Use a tiny bit of water or edible glue so they stick to the surface of the cake. Press each one gently to make sure it lays flat.
If you’re decorating with kids, polka dot accents are a great choice. They are simple to make and don’t have to be perfect, which adds to their charm. You can even let everyone pick a few colors to add a personal touch.
You can use polka dots on round cakes, sheet cakes, or even cupcakes. They look great on all shapes and sizes. For a true 1970s look, pair them with other shapes like stripes or flowers.
Polka dot fondant details are a fun way to add color and personality to your cake. They’re easy to create and always make your cake stand out in a cheerful way.
Key Elements of 1970’s Mod Retro Cake Design
1970’s mod retro cakes stand out because of their bold colors, eye-catching patterns, and unique decorating methods. To capture the real look, you need to pay attention to color choices, design shapes, and special cake finishes.
Signature Color Palettes
Colors from the 1970s were both lively and earthy. You’ll often see combinations of avocado green, burnt orange, and mustard yellow, paired with brown, beige, or cream. These colors can be used together or as accents on white cakes for a bold pop.
Popular 1970s cake colors:
| Warm Tones | Cool Tones | Neutrals |
|---|---|---|
| Burnt Orange | Avocado Green | Cream |
| Mustard Yellow | Teal Blue | Tan/Brown |
| Rust Red | Baby Blue | Beige |
Don’t forget brights like hot pink or bright purple for a playful twist. The key is mixing rich, deep tones with softer pastels or earthy shades. Play with different color layers or stripes for a real retro effect.
Typical Patterns and Motifs
1970’s mod design loved repeating patterns and bold shapes. Flowers were everywhere, especially large, simple daisies and sunbursts in contrasting colors. Geometric designs like zig-zags, stripes, checkerboards, or circles are also classic.
Common 1970s patterns:
- Daisies
- Wavy lines
- Polka dots
- Chevron or zig-zag stripes
Try mixing several patterns on one cake, such as pairing flower motifs with swirly lines. Overlapping circles or bold blocks of color create a true mod look. Borders of dots or shapes add an extra design detail without a lot of work.
Iconic Decorative Techniques
You don’t need fancy tools—many 1970s cakes used simple techniques. Piping with stars or dots, using bright marzipan or fondant cutouts, and outlining designs with chocolate or colored icing were all popular.
Easy ways to decorate:
- Pipe borders with a star tip
- Add flower-shaped fondant pieces
- Use edible paint for graphic designs
- Place repeating dots or lines around the edges
Piping is often neat and bold, not delicate or frilly. Layered icing in different colors helps the patterns stand out. Don’t be afraid to add a little glitter or metallic dust—these touches were sometimes used to make cakes sparkle at parties.
Tips for Creating Your Own Mod Retro Cake
You’ll need certain baking supplies and vintage ideas to get the right 1970’s mod retro look. Picking the right tools and colors makes decorating easier and helps your cake really stand out.
Choosing the Right Supplies
Start with round cake pans, since round shapes were a big part of the mod style. Use a turntable for smooth icing, and offset spatulas for clean lines. Piping bags with various tips help create dots, stripes, and shapes that are popular in retro cake designs.
Choose food coloring in bold shades like orange, teal, yellow, and pink. Gel colors give stronger results than liquid ones. Fondant can help you cut out flower or geometric patterns. If you want texture, use sprinkles or edible glitter, but don’t overdo it—mod cakes still look simple and bold.
Key supplies to have:
| Item | Use |
|---|---|
| Round pans | Classic mod shape |
| Gel food color | Bright, deep color tones |
| Fondant | Clean shapes and details |
| Piping tips | Variety in lines and dots |
| Edible glitter | Adds sparkle where needed |
Incorporating Vintage Inspiration
Look at actual 1970’s patterns, like polka dots, chevrons, daisies, and bold color blocking. Find inspiration in vintage fabric, wallpaper, or even old kitchenware. If you have magazines or photos from the 1970s, use them to spot color pairings or shapes that repeat often.
Focus on just a few key shapes so the cake doesn’t look too busy. For example, you could use large daisies for a flower power theme, or thick stripes in two or three colors for a clean look. Mixing too many patterns can make the cake less eye-catching, so keep it simple and stylish.
Take time to choose your colors and patterns before you start decorating. Sketch your design first if it helps, and remember that clean lines and bold shapes are what make mod retro cakes memorable.